|
|
April 1, 2009
 Because Powerpools are commonly available Powersets to all characters (even Villains), I put together a separate guide for just them. Along with pictures and descriptions, I give relative strengths and weaknesses of each.
If you're like me and like to make concept characters, you may find a pool power that most people ignore that would be perfect for your new character.
Jordan's Guide to Power Pools Page: 1 1 Power Pools - Fitness & Speed | 2 2 Power Pools - Teleportation & Leaping | 3 3 Power Pools - Flight & Leadership | 4 4 Power Pools - Medicine & Concealment | 5 5 Power Pools - Fighting & Presence
May 16, 2007
Fire Blast
All power sets in coh have secondary effects. Fire is a simply about damage. Your attacks do damage and the secondary effect is extra damage, usually dot. Because of this, you can do some ridiculous amounts of damage and if you like to see massive groups of enemies dropping like Bush's approval ratings, Fire Blast is for you.
Note that all power calculations have been normalized versus brawlTherefore, if a power is listed as being 200% the power of brawl and your brawl does 50 damage, then the power will do 100 to the same target. All powers on this page were tested against the exact same level of enemy and were unenhanced at the time.
Flares
Fire Blast
Fire Ball
Rain of Fire
Fire Breath
Aim
Blaze
Blazing Bolt
Inferno
Summary
As sets go, I haven't seen many where I wanted so many powers. Especially since they revised Defiance and it's actually worth taking all your low attack powers! It's also so simple to figure slotting. Everything is damage with its secondary effect being… more damage!
Shazel's Fire/Fire/Fire Blaster Guide Page: 1 | 2 | 3 | 4 | 5 5 Shazel's Fire Manipulation Guide | 6
Jtag diagnostic: For best performance, put a 'no_image.gif' generic image for missing images in your root graphics folder Jtag diagnostic: For best performance, put a 'no_image.gif' generic image for missing images in your root graphics folder Fire Manipulation
All power sets in coh have secondary effects. Fire is a simply about damage. Your attacks do damage and the secondary effect is extra damage, usually dot. Just like with Fire Blast, you aren't worried about slowing, stopping, or controlling anything. Just burning it to ashes.
Ring of Fire
Fire Sword
Combustion
Fire Sword Circle
Build Up
Blazing Aura
Consume
Burn
http://www.jordans-town.com/graphics/guides/characters/shazel/powers/burn.jpg not found
Summary
This power isn't given much credit online and with most such powers, I'm eager to try it and see if it has hidden potential.
Slotting
 | Attack standard: 80%+ |
 | Attack standard: 30%+ |
 | It already recharges before it can be used again so no need to slot this |
Hot Feet
Summary
Just more damage for you to play with. There's no particular strength to Fire Manipulation so I think that you will mostly end up with this set because you don't like the other sets, because you want raw power, or for a concept character (like Shazel). Of course, that's more than enough of a reason for me
Shazel's Fire/Fire/Fire Blaster Guide Page: 1 | 2 | 3 | 4 4 Shazel's Fire Blast Guide | 5 | 6
May 14, 2007
Oppressive Gloom
Summary
Keep nearby enemies disoriented while you take continual damage for as long and you leave this toggle on. Hmm… it drains endurance and it drains life at an alarming rate. When I took it on the test server, I found the power to work too slowly, in too small of an area, and drained life far too fast to really be useful.
Worst of all, you have to be in melee range which isn't the best place for a defender to be most of the time. If you take it, it will probably be situational at best and would combine well with the situations where you're hanging out just behind the tank spamming heals. That way, you're constantly healed and the enemies are kept under control.
Skip it unless your other powersets compensate for this power's deficiencies or you're ultra desperate to avoid Stalker strikes in PvP.
Dark Consumption
Dark Embrace
Summary
A nice and welcome shield against major forms of damage (smashing, lethal, toxic, and negative energy). The resistance begins at ~25% so becomes significant with a few enhancements. By adding this to your arsenal, you get critical resistance to the most common forms of damage (lethal and smashing), and, most importantly, you will now have resistance and defense against all forms of damage in the game! Assuming you have Shadow Fall from the Dark Miasma set of course.
It's kind of hard to see the armor in the picture… I wonder if I had my graphics turned down.
Slotting
| Shoot for 50%+ The more, the better. |
| It's already fairly low so don't sweat it, but take any reduction you get from Set Bonuses. |
| It only takes 4 seconds to come back after it drops, so not a huge priority. |
Soul Drain
Jordan's Dark/Dark/Dark (D3) Defender Guide Page: 1 | 2 | 3 | 4 4 Jordan's Guide to Dark Miasma | 5 5 Jordan's Guide to Dark Blast | 6 | 7 | 8
Jtag diagnostic: For best performance, put a 'no_image.gif' generic image for missing images in your root graphics folder Let's talk range. All dark blast powers have great range and your sniper attack (which you only have to wait until level 4 to get) has the longest range of any attack in the game. A dark defender makes a great puller since even at the earliest levels, you can hit from a long way away and whatever you hit has reduced accuracy.
Best of all, most Defender Secondaries are shared with Blaster's primaries, but darkness can only be found with Defenders.
Dark Blast
Gloom
Moonbeam
Summary
I love this power. It has the longest range of any attack in the game and it looks really cool. Like most snipe powers, the activation is very long and can be interrupted by things like getting hit or moving. So make sure you've completely stopped moving and that nothing's about to hit you before launching this power or you just wasted the endurance cost of activating it.
See that target waaaaayyyy off in the distance? Yeah, I can hit that…
How to Use
 | Unslotted Strength |  | 729% of Brawl |  |
Anyway, Moonbeam is an excellent way to start a battle when teaming since your target will take significant damage (about equal to Dark Blast and Gloom combined) and is such long range that it's rare that they'll be able to return fire before you run and hide behind your team mates or a wall.
It's also a very good way to finish off a runner as long as they don't run behind a wall or off a ledge before the attack fires.
The key is to fire Moonbeam when you have little to no chance of getting interrupted by damage. You will discover these situations very easily with some practice, but here are some that work for me:
- In teams it's usually pretty easy when you don't have aggro, but make sure to target something that's being hit by someone else too or you might face drawing unwanted attention. Also make sure to pick a target with a fairly significant amount of life remaining or they could go down before your attack even launches.
- When soloing, after you get an activation reduction enhancement or two in it, you can often fire it between enemy attacks if you time it right.
- Because Darkest Night will make your enemies miss you most of the time, you can often fire Moonbeam safely after they've been debuffed.
- The delay caused by the "Ouch" animation that enemies do after getting hit with Gloom can give you enough time to fire Moonbeam as long as you do it very quickly after triggering Gloom.
- Moonbeam also stacks well with Tar Patch since it slows their attack rate.
Slotting
| Slotting Priority | | =  > >  > > > > > >  | |  | |
| Attack standard: 80%+ |
| The biggest disadvantage to a snipe is the activation delay. Manage it by giving this 80%+ enhancement. |
| Attack standard: 50%+ |
| Attack standard: 30%+. Particularly so with this power since it costs a LOT to fire and can be interrupted (wasting your endurance). |
| Not a priority, but nice to have. Take it if you can. |
| Unlike Dark Blast and Gloom, range has an actual purpose in this power. It's already the longest snipe in the game, but if you can make it even longer, why not!? You'll be able to attack from so far away that you'll be able to hit them twice before they can even get to you  Of course, it's not a priority, but take it if you can. Of course, it's not a priority, but take it if you can. |
| Don't slot for this. The other enhancable attributes are far more important. |
Dark Pit
Summary
You target something, fire Dark Pit, and it, along with nearby enemies, get stunned for a while (as long as you've slotted some accuracy enhancements and they're not too high level). Sounds a lot like howling twilight without the slow, damage, rez, and a chance to miss (HT doesn't miss). Hmmm…
If you took Dark Maisma as your primary power set, Howling Twilight is stronger and has a ton of secondary effects that Dark Pit does not I tried this on the test server and found that when you attack one of the enemies that has been stunned, he fires back and then resumes the "stunned" animation similar to Fearsome Stare. It might have been a bug, but this still isn't that impressive.
Ok, 0 out of 5 is pretty low. Well, even if you didn't take Dark Maisma, it's still only a Mag 2 stun that is impossible to stack because of it's recharge delay. What were the devs thinking? SKIP!
Tenebrous Tentacles
Summary
Holds and damages enemies in a cone in front of you. Controlling a battle where you have enemies running all over is very hard. Using this will keep enemies you worked so hard to herd together/sneak up on from running all over. Note that it recharges in plenty of time to use it again before the effect from the first one wears off.
You can see that the Tentacles hit this entire group. It has a great cone range, but doesn't go as deep as Night fall. However, Night Fall has a much narrower cone. Look closely and you can see that the 11's are damage from the TT while the 13's from Night Fall miss four or so enemies on the outer edges. To fix this, back up before you fire Night Fall to fit more people in the cone
The cone is nice and wide, but not as deep as I'd like so you an often miss enemies further away. Even the ones you hit can still hit you back (they're only immobilized), but like most dark powers this drops their accuracy.
How to Use
Use this to make sure that your victims don't get away from you. This is especially important when badge hunting or if you've worked hard to herd stuff together into area effects like Tar Patch. It also helps to keep stunned enemies from wandering off or prevents them from getting somewhere you don't want to be.
| Unslotted Strength | | 298% of Brawl | |
For the endurance cost, this is a waste to use on less than 2+ enemies unless you just want to keep an enemy from moving. One you have Dark Servant (who uses this and Petrifying Gaze constantly), you won't need use TT on anything but 3 or more enemies (which is, of course, assuming you took Dark Maisma as your primary).
Slotting
| Slotting Priority | | > > > > > |  | |
| Attack standard: 80%+ |
| Attack standard: 50%+ |
| Attack standard: 30%+ |
| All your attacks do this, but this is an AoE debuff. Definitely take advantage of it and put your efforts on Accuracy Debuffing into this power compared to the rest. 20%+ |
| Definitely get this up just a bit. It's default range is 40 feet compared to 60 or 70 for ALL YOUR OTHER POWERS. You will definitely notice the lack of range unless you bump it up. 20%+ |
| If you get it by accident take it. Never hurts. |
| It recharges in 10 seconds and lasts for 20. You can already fire it twice before they can move again so why enhance Immobilize at all? Spend your energy on the others. |
Night fall
Torrent
| Score | | 3 to 5 of 5 (depending on your other powers) | |
Summary
| Unslotted Strength | | 133% of Brawl | |
Torrent does a small amount of damage with knockback in a cone in front of you. This would be good for defenders who find that enemies are getting too close too quickly, but not if you have effects that require enemies to stay in one place or stay close together.
For example, with Dark Maisma as a primary power set, I want foes to be in a nice tight pack, not flying all over. What's the point of using Tar Patch to slow them, Tentacles to root them, and Darkest Night to make their accuracy worthless, if you blow them all out of range of these effects?
On the other hand, if you take a different primary (like Storm), you might like this power. It has a wicked-strong knockback on it (check the distance these Hellions were thrown!)
Slotting
| Slotting Priority | | > > > > >  | | | |
| Pointless if it misses. 60%+ |
| Knockback powers are best when they can be used again soon. Slot for about 30%+ recharge and you'll find it pretty usable. |
| It's pretty endurance heavy. Try to give it at least 20%. |
| Slotting this would depend on how you handle the rest of your powers. If you use this as a major move in your battles, you should slot it. Otherwise, leave it at its default. |
| Slot this way up to just push stuff as far away from you as you can. Leave it unslotted to be able to do more controlled pushing (my preference). |
| You could buff these, but it's not really necessary. |
Life Drain
| Score | | 3 to 5 of 5 (depending on your primary) | |
Summary
| Unslotted Strength | | 264% of Brawl | |
| Unslotted Heal | | 8% of Your Life Total | |
Damages an enemy and heals you. This is really only useful if your primary powerset doesn't already have a better power. For example:
-
A D3 has Twilight Grasp which does the same thing except that it heals all allies instead of just you so this is a waste.
-
An Empathy Defender has Recovery Aura which doesn't require a target like Life Drain and heals the whole group.
-
rad users have Radiant Aura which also heals you plus the group.
How to Use
I never noticed this until I did the math, but Life Drain has the same range as Dark Blast and does the same amount of damage while healing you. If you want another attack to fill your chain or find that you need that extra heal now and then, this might be a good bet.
In practice, I found that I didn't need the attack and that the heals from Twilight Grasp (along with fluffy throwing the same thing) make this unnecessary, but if you didn't take one of the sets listed above, this could be a very good power. For example, a Storm/Dark (since Storm has no self heals).
Slotting
| Slotting Priority | | > or  > > | > > | | |
| Pointless if it misses. 60%+ |
| If you're slotting is primarily as an attack, 80%+. Otherwise 20%+ |
| If you're slotting is primarily as a heal, 80%+. Otherwise 20%+ |
| Either of these can be buffed equally depending on your taste. |
| No need for further acc_debuff. Your other powers do this better. No real reason to slot range unless you are constantly trying to heal off runners. |
Blackstar
http://www.jordans-town.com/graphics/guides/characters/jordan/powers/Blackstar.jpg not found
Summary
It's a nova power that's far weaker than those of blasters, but is still a lot of fun. Besides doing massive ammounts of damage (for a Defender), it does significant Accuracy Debuff to all affected enemies.
Honestly, if you're dying for another power, you could skip this one. It's less effective than it is fun, but fun is the point after all. Also remember that unlike other nova powers, there is no knockback so even if you don't kill them, they're still nicely huddled for further attacks AND as with all dark powers, their accuracy is debuffed so you have a better chance of surviving even if you do draw all the aggro to yourself.
How to Use
| Unslotted Strength | | 1257% of Brawl | |
That's right. I said 1200 percent the strength of brawl. Drop a group to between one third and one half of their life total and use this to finish them off. If you have Dark Maisma as a primary powerset, make sure that Dark Servant is out to take aggro and to perform holds and heals on any survivors while you wait for the endurance recovery prevention effect to wear off. In groups where there are plenty of other team members to get enemy attention, fire it whenever you want though never as an opening move.
I didn't get a very good shot of a large group of enemies, but you can definitely see how good the effective range of Blackstar is.
Either way you play it, as of issue 6, you can take an endurance recovery inspiration to get a little endurance to use to continue the fight immediately. Though you will run out very quickly, it prevents down time and can give you back your toggles temporarily. Most importantly, if you have Dark Consumption from the Darkness Mastery set, you can suck endurance from survivors to get back in the game at full force.
I've never seen it miss so I don't recommend Accuracy, but I like it to come up more often so I added three additional Recharge Reductions. However, without being fully slotted for damage, there's little point to taking the power.
Slotting
| This power is all about damage. 80%+ |
| Waiting 6 minutes between uses sux. Give it 80%+ for an ~ 3 minute wait time instead. |
| The Acc Debuff is already huge (>60%), you're going to lose all your endurance after launching it anyway, and it never misses. Don't bother with these unless you've found some killer way to use this power that I didn't figure out. |
Jordan's Dark/Dark/Dark (D3) Defender Guide Page: 1 | 2 | 3 | 4 4 Jordan's Guide to Dark Miasma | 5 | 6 6 Epic Power Pools - Darkness Mastery | 7 | 8
NOTE! This page has not yet been adjusted for IOs and their affect on slotting and builds.
Medicine
Aid Other
This is the power you see the Crey using all the time where they whip out a little spray gun and heal a cryo tank or something. It takes a few seconds to use and is interruptable, but heals an ally for a decent amount of life. You have to be somewhat close to use it.
There are two ways to slot this for it to be usable mid-combat. One is to halve the interrupt time so you have better odds of firing it while taking damage. If you play an at that tends to take damage fairly constantly, this is the better option. Then it just becomes a matter of timing for getting the heal in between attacks.
The other is to halve the recharge time so you can use it more often during combat. The difference is in what kind of character you play. If you have the enemies constantly under control or if you're in a team and aren't taking aggro, you can afford the long interrupt time and probably would rather fire it more often.
Note to MasterMinds, this is the slotting you'd want.
In the last scenario where you tend to heal people only between battles and not during battle, you'll be better off buffing the heal rather than the other two characteristics.
For this power, slotting is all in your playstyle.
Stimulant
This frees an ally from hold effects (sleep,stun, etc) and makes them resistant to these effects for a while.
Like before, you can halve the interrupt time to use it better in battle.
However, in all other respects, slotting for recharge is the better option.
You want to be able to fire it rapidly because if a teammate gets stunned, it's usually going to happen to another teammate in another second or two. Also, if you're going to enter a battle where there are enemies you know will stun you, you can fire this effect on each team member to "immunize" them to the effect temporarily. The key here is to be able to use it on everyone in a very short ammount of time so the effect doesn't wear off your first team member before you've applied it to the last. Lastly, the effect stacks. If one of your teammates seems particularly weak to stuns or is very important that they don't get stunned (like your tank), you can fire the effect multiple times on the same ally (it stacks).
Aid Self
Heals you (interruptable).
If you have built a character type that can spare 3 seconds in the middle of combat or if you are good at running and coming back after healing, just slot it with heals to get the most out of it each activation.
If you really must use it in the middle of battle, slot with three activation Reducers.
Resuscitate
rezes an team member (not including you of course).
A simple power that's the same as an awaken inspiration. The only slotting that makes sense is to reduce the long recharge time of three minutes. Usually when you're reviving people, it's more than one.
If you have a different rez power and this is just a filler, you can save the slots and just use one Recharge Reducer.
Concealment
The Concealment powerpool is the typically way of achieving stealth. While most stealth powers will let you sneak around, some are better than others for sneaking missions or taking awesome screenshots in the midst of enemies.
Stealth
Stealth (the power) only makes you harder to see. If you get close enough, an enemy will see you and start attacking. In door missions, this power isn't very useful since you will have to pass very close to enemies.
However, if you use Stealth with Hover or Fly, you can float across the cieling of warehouses, offices, ships, or any other mission that isn't extremely close quarters (caves) and you won't be seen.
The best combination with Stealth is Super Speed. Super Speed has a stealth element attached to it that when combined with Stealth gives FULL invisibility. You can stand in the middle of a crowd of enemies and take any photo you want, launch any power, click glowies or whatever you want with no restrictions.
There are some enemies that can see through any invisibility so watch out. They include Ritki Drones, Ruraluu Eyes, Snipers, and Monsters (of any type).
Grant Invisibility
Pretty simple. It gives invisibility to another player. For sneaking through a mission, this is a viable alternative to sneaking to the end and tping the team to you if you don't have or don't want tp. Also, sneak and tp is effective, but can be more boring for your team. If you give everyone Invisibility, they can search around for the end boss or Glowies too. This tactic is especially useful for those missions that require simultaneous action.
The effect of this power is temporary so warn your teammates. Also, they can attack and use any power, but if they do, the Invisibility will end.
Invisibility
This gives you strong concealment, but has two important disadvantages. One, you can only use powers that affect yourself. Two, you can only use powers that affect yourself. The point here is that it works like Stealth and ss, except that you have to turn off Invisibility before attacking (which could be very, very bad).
Phase Shift
It makes you hard to see, but detectable like Stealth. The difference is that you can't be hurt by anything in the game so even though they can see you, they can't do anything about it. This opens up some interesting ways to play.
For example, if two enemy groups are too close together in a mission, a player with phase shift can go walk into the middle of one group and lead them away while the team deals with the others. You can also sneak to the end of missions and though you will be seen, you can make it to the end without getting hurt. It also makes for perfect herding since you have no danger of dying while gathering everything together.
Disadvantage 1: You can't use attack powers while it's on. So far it's still better than Invisibility which has the same disadvantage, but not the same advantages.
Disadvantage 2: The devs made changed it from a toggle power to a click power. BZZZT! You lose! If the recharge wasn't so ridiculously long, maybe, but as it is, meh. It takes work to use this power.
Jordan's Guide to Power Pools Page: 1 1 Power Pools - Fitness & Speed | 2 2 Power Pools - Teleportation & Leaping | 3 3 Power Pools - Flight & Leadership | 4 | 5 5 Power Pools - Fighting & Presence
NOTE! This page has not yet been adjusted for IOs and their affect on slotting and builds.
Flight
Air Superiority
Not particularly powerful or cool looking, the main advantage to this power is that it drops an opponent from the air. If flying enemies always tick you off, this may be a power for you. That or if you need a double over-hand attack for your character concept.
Hover and Fly
Hover and Fly are basically the same as far as the power goes so I'll talk about both of them at the same time.
The two powers from this pool that you're likely to take are Hover and Fly, and they have most of the same advantages:
- Fun - There are some views and screen captures you can't ever get without fly.
- You can get to places that no one else except Teleporters can (and flying is much easier than accurate teleporting). Tops of statues, tops of buildings, anywhere you please.
I flew up to the highest building in Crey's Folly to take my final screen capture before deactivating my account. There, Jordan waits till the time that I can return…
*Sniff*… If you read the tells in the chat window, you can even see my good friend Justice Avatar promising not to forget me :*(.
- Unattended travel - Don't underestimate the power of turning on "run" and walking away while your character flies/hovers to a mission, zone entrance, or whatever. If you have to get up every now and then for a drink, potty break, or to do little things around the house now and then, this is for you.
- Safe - When traveling through dangerous zones, landing in the wrong place with Super Jump will get you killed. Super Speed has a stealth element, but if you get stuck on a land object (like a dumpster or wall) next to a group of enemies for a few seconds, they could notice you and beat you senseless. With Teleport, you run the risk of running out of endurance or teleporting to a bad spot where some enemies were hiding. With fly, you can go high above all buildings and terrain and just fly.
- Useful to solve the vertical problem of Super Speed - I run most of the way and just before I get to an obstacle, hit the fly power to get over it. Then I turn off the fly power to use the
speed of Super Speed again. This combination gets you from place to place VERY fast.
- Semi invisibility with a stealth power - While Super Speed is the best with stealth powers, in open areas or warehouse or ship missions, flying with Stealth is just as good. I've been able to get to the end of many missions with just hover and Stealth without drawing any fire. The place where this breaks down is in caves where there's usually not enough space to hover over enemies.
- Badge hunting - Finding a certain type of enemy, reaching exploration points, and locating plaques are all easy with Fly. You can also spot jtagwrite="Giant Monsters"/> like Babbage, Hydra, Paladin, etc much easier.
- Knockback/knockup protection
Certain powers like those used by Earth Mages (cot) won't even hit you, but strong attacks that do hit will only make you do a midair flip and you're back into the action again.
Hover
Hover is slow, but can get you anywhere Fly can with far less endurance. It also adds a bonus to your defense. If you take it, but don't want Fly, three slot it with fly enhancements. Otherwise, save the slots for other powers.
Fly
Fly uses more endurance which is a problem early on as you'll use more endurance than you gain and run the risk of falling out of the air. However, I really like Fly so I took it as my support power for Super Speed (which I kept for Sneaking purposes).
With an Endurance Reducer, I can often fight battles with Fly on, but if it's dropping too fast, I switch to Hover until the battle is over or the end has recovered a little.
Group Fly
I don't know that I've ever seen this used. At best, it can be a good way to bring your pets with you, but in group play, it has just about no use. If you're trying to help someone get to a mission or certain location, you're much better off with Recall Friend from the Teleport pool.
Leadership
This set was more useful when they allowed the effects to stack if there were two or more people on your team with these powers, but that's changed as of issue 7.
Note to Masterminds (Villain class). Leadership is great because it affects you and your pets. As someone with a built-in team, this is a primary power pool for you.
Maneuvers
Increases the defense of your and any pet or teammate nearby. For this to be useful, you need to be the kind of person who plays in teams and typically stands near other players. If you're a flyer for example, chances are you won't be near the other players much and this would be kind of a waste of time.
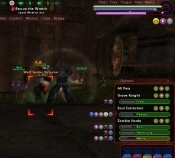
TIP: Not everyone realizes this but any thing that affects you or your teammates (and pets in cov) has a small icon next to your name/power bar. If you look in this photo, you can see the purple-colored shield signifying the effect of the Maneuvers power on my power bar and the powereffects bar of each of my pets that's close enough. This picture will also give you a pretty good idea of the range of the power based on which pets are covered and which aren't.
Slot with endurance reducers if you find you're running to many toggles.
Assault
Increase your attack and the attack of nearby pets/players. Get it or don't for the same reason as Maneuvers. The only useful enhancement to put in it is end Reducers.
Tactics
Increase your acc and the acc of nearby pets/players. If you've taken either Assault or Maneuvers, make sure to get this power. Imagine being able to drop accuracy from all of your other powers! Not only that, but the team will notice when you're in range or not because of the difference in their hit percentage (especially against high-level opponents).
Vengeance
You die. Click this power to give your teammates some strong buffs to damage and defense. You may have seen this power used by Nemesis enemies.
One problem with the power (besides having to die) is that a lot of people feel like it may give your team incentive to let you die:
- Oh sorry! Forgot to heal you.
- Looks clear! You go first.
- Oops, didn't see that war wolf there…
On the other hand, if you built a character that's prone to dying (like most blasters), you may get tired of teams constantly lecturing you about being a death machine until you get this power. Now they'll falsely believe that you "took a hit for the team" instead of died due to a stupid mistake or poor build .
The major hurdle to using this power besides dying is that you have to be in range of your team for the power to work. While you could train your team to gather around you when you die (I can see it now "I'm dead! gather!" (lol) ), it's probably easier to enhance the range of vengeance before anything else.
Jordan's Guide to Power Pools Page: 1 1 Power Pools - Fitness & Speed | 2 2 Power Pools - Teleportation & Leaping | 3 | 4 4 Power Pools - Medicine & Concealment | 5 5 Power Pools - Fighting & Presence
NOTE! This page has not yet been adjusted for IOs and their affect on slotting and builds.
Recall Friend
A great and commonly used power that let's you teleport a team mate from 1000 yards away to a location next to you. Here are some sample uses:
- Getting a team mate to a mission door fast. Very important early on when everyone's travel is slow.
- For a team mate who shows up late to a mission, you can tp them to the rest of the team rather than wait for them to find you in the map.
- Pulling a team mate who's in trouble from the battle field (out of range of further fire.
- Pulling a dead team mate from out of range of enemies so they can be rezzed or use an Awaken.
- Helping a team mate who's stuck somewhere. For example, I spent 25 minutes trying to get to the reactor in Terra Volta because I only had Super Speed and couldn't
figure out how to get up the huge walls. If someone in my group had Recall Friend, we'd have been set.
- For sneaking a mission. You run invisible to the target enemy of the mission (boss or whatever) and teleport the rest of the team to you. This is a great way to cut down the time of those task forces.
Last thing: here's a bind to help with teleporting team mates. It not only lets them know a TP is coming, but if there's another member of your team helping with the teleports, it lets them know not to do the same one.
/bind f12 "team $target! I am opening a portal through the darkness!$$powexec_name recall friend"
Teleport Foe
A commonly disparaged power that's actually very useful (especially now with pvp). It used to be hated because it would immediately draw aggro from every enemy near the one you teleported, but the aggro range has been significantly reduced and there are ways to use it without worrying about the
aggro:
-
If an enemy is running away, target them and use TP Foe to bring them back.
This is very useful for hunting or for "Kill leader and crew" missions if one off the leader's crew tries to run. This is especially useful if the runner goes through another group of enemies or can fly when you can't.
-
If you are on a ledge, high building, or top of a ravine and your target is below you, you can pull them up one at a time and deal with them while the others fruitlessly try to get to you.
-
Attention Kheldans!. Another use is to open battles by targetting a problem enemy (such as a Void Seeker) and TP'ing them to you for immediate destruction. Even if you aggro any of the enemies near him, he'll be long dead before the rest get to you.
-
Use it as a pulling technique. Like any other attack, using TP Foe will usually get the attention of a few enemies near your target. Used properly, you can chop enemy groups into smaller and more managable chunks.
-
In pvp, you can teleport Villains to your location to be pummeled by you and your hero friends
 />. />.
There's no point if it misses. Slot with at least two accuracy. More if you try to tp anything higher than minions
Teleport
Commmonly known as the fastest travel power in the game. Now even better! I've heard that with issue 7, they're getting rid of that annoying animation delay that prevents you from teleporting one after the other in rapid succession. I have actually seen this work as I played a bugged mision in cov that gave me temporary nictus powers including teleport. At first I thought that warshade teleportation was just naturally faster, but I found out later that they had an error that skipped the animation. It was
very fast and not as dizzying.
Anyway, use this bind to teleport much faster around the city:
/bind shift "powexec_name Shadow Step"
This activates the teleport power and gives you a target on the screen so you can choose where to teleport. Note that if the target is red, you can't teleport there (though this is really stupid. You should be able to teleport to any location on the screen that the target touches).
The moment you come out of the teleport, hit the shift key again to bring up your target. You'll have to figure out the timing because if you go to fast (as of issue 7), the game gets confused and will spin you around teleporting you to the left or right randomly.
Note that it's extremely common to take Hover with Teleport since you only get a second or two to select your next Teleport point before dropping like a stone.
Group Teleport
Same as Teleport, but takes all nearby teammates with you. I think this power is difficult to use effectively, but isn't given enough credit. For example, many Teleporters tell me how they can escape battle in an instant with Teleport. What if you could take your whole team with you when you all started to die? Not only would you save a few folks, but the dead bodies would come with you as well (assuming you were all close to each other at the time).
You could also ambush a group or monster by doing a team Teleport right on top of them. For enemy groups that usually do significant damage while you're trying to get close, this is a way to close the distance instantly. If a few team-members are stuck in a hole, you can go down and bring them all up at once rather than wait for Recall Friend to recharge.
Anyway, it's a very rarely taken power, but can be useful with some imagination.
Leaping
One advantage of this pool, is eventual access to Acrobatics which provides some protection from holds and knockback. The other is that you can combine it with Super Speed to have one of the best travel power combinations in the game.
Jump Kick
Jump Kick is a basic attack that has a chance to do knockback. If you want an extra attack or just need a kick or knockback effect for a character concept, go for it, but otherwise, it's not that special. Don't bother slotting it unless you have the slots to spare or it fits your concept like I said.
Combat Jumping
Combat Jumping lets you jump fairly high in missions and gives a bonus to defense. In the levels between 6 and 14, you will be able to get over walls in cities that you wouldn't have been able to otherwise which greatly assists with your travel time. Given the choice, I almost always take this over Jump Kick as my prerequisite power to Super Jump.
Super Jump
Super Jump is a nice travel power in that it's fast and has almost no vertical problems. Before my level 24 respec, it took me about 15 minutes to get from the Terra Volta entrance to the Reactor where the final mission took place since I only had Super Speed at the time.
There is one specific danger associated with Super Jump. If you are playing a squishy character and while traveling, you land in a group of enemies, they will immediately fire on you even though by the time the effects launch you are long gone.
Acrobatics
Like most defense-only powers, Acrobatics isn't a lot of fun, but can be very useful. For tanks who get tired of hitting the ground or getting held, the knockback and holds will save their life. Remember that knockback is just annoying but holds will drop your toggles.
You can only slot end Reducers or Recharge Reductions. Recharge is mostly pointless for toggle powers so go with an End Reducers.
Jordan's Guide to Power Pools Page: 1 1 Power Pools - Fitness & Speed | 2 | 3 3 Power Pools - Flight & Leadership | 4 4 Power Pools - Medicine & Concealment | 5 5 Power Pools - Fighting & Presence
Power pools are sets of powers (four in each set) that are accessible to all ATs starting at level 6. They increase the variety of builds that players can take which is desperately needed because you can get kind of depressed putting a lot of effort into a character only to find out that everyone else built theirs the exact same way.
Each pool works the same way: The first two powers are available from level 6, the second at 14 (and you must have taken one of the two level 6 powers), the last at level 20 (and you must have taken any two of the other three powers).
Fitness
Being able to play without a lot of down time between battles is the primary reason I recommend this pool. Health increases your heal rate and Stamina increases your endurance recovery rate. Together, you won't have to rest between most battles and it's less likely that you'll run out of endurance during a fight.
The other big reason to take Fitness is to augment your travel powers:
Swift
If you hate running slowly in combat or missions, but don't want to waste endurance on Sprint, Swift gives you roughly the same effect without having to toggle a power.
But the best use of Swift is to make Fly faster. Since Swift can take flight enhancements, you can boost the "slowest travel power" and make it just a little bit faster. Since I have many flying heroes, that's a big bonus to me. At late levels when you start to fly at the speed cap without Swift, you can change your slots back to enhance run.
Slotting
 | |  | | | LEGEND | Legend | The left side of the colored range in the middle is the minimum recommended percentage for slotting (which will also be written in black). The right side is the maximum % limit of enhancement as set by the game. That's why recommendations of 0% (meaning it doesn't matter what you slot) seem so large. The white colored values below the graph are the unslotted strength and the fully slotted stregth of the power. |  | Minimum % | | Unslotted power Max power |
| run % | If you slot this for run and aren't taking Super Speed, go for a higher amount, but otherwise, just use the default slot and put a single run enhancement in it. |  | 30% | | 0 0 |
| fly % | The neat thing is that this adds speed to both hover and fly. If you use it that way, slot it as high as you can. |  | 70% | | 0 0 |
| | |  | |  |
Hurdle
While taking Swift with Super Speed can make you run really fast, if you can't jump over obstacles, you're not going to get anywhere. Also, with Super Jump, Hurdle will increase your jump speed. So generally, I recommend Hurdle for SJ and SS.
Fly doesn't get any benefit from hurdle so you should always take Swift if you want to fly.
As far as Teleport, it doesn't benefit from Hurdle OR Swift, so just take the one you like better.
Slotting
| | | | | LEGEND | Legend | The left side of the colored range in the middle is the minimum recommended percentage for slotting (which will also be written in black). The right side is the maximum % limit of enhancement as set by the game. That's why recommendations of 0% (meaning it doesn't matter what you slot) seem so large. The white colored values below the graph are the unslotted strength and the fully slotted stregth of the power. | | Minimum % | | Unslotted power Max power |
| jump % | If you don't take Super Jump, go a little higher, maybe 60+%, but otherwise, just slot as needed. Generally a single slot is enough unless you're going for set enhancements of some kind and have mad slots to spare. |  | 30% | | 0 0 |
| | | | | |
Health
While you could take both Swift and Hurdle on your way to Stamina, you could theoretically skip Health, but I don't see why you would. Having additional regeneration is always a benefit both for times when you're in battle and the time between battles. But in or out of battle, when ISN'T it a good thing to regenerate health faster?
Slotting
| | | | | LEGEND | Legend | The left side of the colored range in the middle is the minimum recommended percentage for slotting (which will also be written in black). The right side is the maximum % limit of enhancement as set by the game. That's why recommendations of 0% (meaning it doesn't matter what you slot) seem so large. The white colored values below the graph are the unslotted strength and the fully slotted stregth of the power. | | Minimum % | | Unslotted power Max power |
| heal % | The bare minimum here is to slot for just one heal and I know a lot of people do that, but every bit counts. For my especially, I always give health two to 3 slots and take the heal % as high as I can (with the last slot for a Heal unique IO if I can afford it). | | 40% | | 0 0 |
| | | | | |
Stamina
There are very few ATs that can get away without Stamina. Doing so makes you play much slower and work harder to conserve energy (though depending on what you play, the powers you take, and how clever you are with enhancements, you can do it).
Also some powers rebuild or reduce your endurance bar (ex. Regen powerset, or Warshades with Stygian Circle, and PeaceBringers with Conserve Power). Playing without Stamina takes some work and effort and most people try not to do it. While I recommend making the effort, there are some times you just won't be effective without it.
Slotting
| | | | | LEGEND | Legend | The left side of the colored range in the middle is the minimum recommended percentage for slotting (which will also be written in black). The right side is the maximum % limit of enhancement as set by the game. That's why recommendations of 0% (meaning it doesn't matter what you slot) seem so large. The white colored values below the graph are the unslotted strength and the fully slotted stregth of the power. | | Minimum % | | Unslotted power Max power |
| end_mod % | If you take stamina, boost it's strength as much as you can. |  | 70% | | 0 0 |
| | | | | |
Speed
Flurry
You smack an opponent repeatedly with a punching combo. Does a decent amount of damage and has a chance to disorient, but has a fairly long activation time (about 3 seconds) during which you won't be able to launch other powers.
It's a good attack, but almost everyone takes Hasten for the faster recharge to ALL powers. Still, I've always wanted to make a Dark Melee scrapper who took Dark Maul, Flurry, and Sands of Mu (of course, I'd actually have to play long enough to get the Sands of Mu veteran reward….) (Edit: Woohoo! I made it and it's an AWESOME concept… Tons of fun to play!)
Slotting
| | | | | LEGEND | Legend | The left side of the colored range in the middle is the minimum recommended percentage for slotting (which will also be written in black). The right side is the maximum % limit of enhancement as set by the game. That's why recommendations of 0% (meaning it doesn't matter what you slot) seem so large. The white colored values below the graph are the unslotted strength and the fully slotted stregth of the power. | | Minimum % | | Unslotted power Max power |
| accuracy % | Because of the long activation on this power, accuracy is the most important thing. Slot this with higher priority than anything else because if it misses, you're going to have a lot of time to regret it while this power misses (whiff whiff whiff). | | 40% | | 75 0 |
| damage % | As with any pool attack, damage is your main priority (after accuracy in some cases like this one). | | 30% | | 0 0 |
| disorient % | This is not a strong power for disorient nor does it activate fast enough to be used consistently as a stun. Your best bet is to use some kind of | | 0% | | 0 0 |
| endurance % | Enhance endurance if you use this power regularly and need the extra endurance that would be saved. | | 0% | | 0 0 |
| recharge % | | | 0% | | 0 0 |
| | | | | |
Hasten
Many ATs have powers that take a long time to recharge. Having Hasten and firing it off pretty much every time it comes up can keep your slow recharging powers coming back significantly faster than normal.
Slotting
| | | | | LEGEND | Legend | The left side of the colored range in the middle is the minimum recommended percentage for slotting (which will also be written in black). The right side is the maximum % limit of enhancement as set by the game. That's why recommendations of 0% (meaning it doesn't matter what you slot) seem so large. The white colored values below the graph are the unslotted strength and the fully slotted stregth of the power. | | Minimum % | | Unslotted power Max power |
| recharge % | Boost this as high as you can. The point of Hasten is either to make you a very tough opponent in battle (due to fast recharge of all your powers) or to help extremely slow powers (usually the most powerful) come back more quickly. | | 70% | | 450s 225s |
| | | | | |
Super Speed
Super Speed and any other stealth power stack to give you full invisibility. With very few exceptions, you could in the middle of a group of enemies and make faces or slap them (/e slap in the chat window) and they won't do anything to you (as long as you don't activate any powers that affect enemies).
This gives you the extremely desirable ability to sneak through missions that only require you to find Glowies or defeat the mission boss and enemies around him. This is especially useful for cutting down the time it takes to complete TFs (though you'll need Recall Friend to really make that work). There are also a wealth of cool screen captures you can take that you could never otherwise.
Don't get me wrong though, mostly the reason I took this power on any of my characters was for speed. Even though Teleport is technically faster, with Super Speed, you can really feel the speed (especially if you took my advice and built a shorter character).
Slotting
| | | | | LEGEND | Legend | The left side of the colored range in the middle is the minimum recommended percentage for slotting (which will also be written in black). The right side is the maximum % limit of enhancement as set by the game. That's why recommendations of 0% (meaning it doesn't matter what you slot) seem so large. The white colored values below the graph are the unslotted strength and the fully slotted stregth of the power. | | Minimum % | | Unslotted power Max power |
| endurance % | Ok, I know I should recommend Run enhancement first, but I actually prefer to lower the endurance instead. At low levels you need all the endurance you can get and at high levels, you're pretty close to the run speed cap anyway. | | 30% | | 0 0 |
| run % | Of course you also want to run fast so slot this up as much as you can, though if you really need the slots, it's just as easy to leave the single slot with just endurance reduction in it. As a compromise, you can always use a combo run/endurance enhancement. | | 30% | | 0 0 |
| | | | | |
Because Super Speeders can easily get stuck in ravines, or behind large walls, it's often desirable to combine it with Super Jump or Fly powers. The simplest way to do this is to take Hover which is a single power that needs only a few slots to be useful.
Whirlwind
You start spinning and toss enemies into the air. This deals no damage, but keeps people from closing to melee range. For builds that use jtag/> or melee range attacks, this is pretty much a waste of time except possibly as an escape mechanism.
As a support character, you could use it to protect yourself, or run into the crowd and save a dying friend by tossing every enemy near him into the air (though this is likely to draw fire to you). Since you can continue to attack while Whirlwind is on, a blaster would benefit by keeping enemies at a distance while firing at them.
The problem is the enormous endurance cost. It's designed to keep you from leaving it on and battling at the same time.
| It's a monster endurance drain. If you're going to take it for any reason, you'll need to lessen that first. Shoot for 90%+ unless you don't want to devote extra slots to Whirlwind (which I would understand). |
| It takes about 20 seconds to recharge which is probably penty unless it drops in the middle of a battle. In that case, you will want it to come back sooner so 30% or so recharge won't hurt. Don't slot recharge at the expense of endurance reduction though! |
| I'm not sure why you'd slot this because it would make controlling where enemies go even harder. Maybe someone else will disagree, but I doubt it. |
I've only taken it on one character (Gale), and it's all kinds of fun Since she has a pet tornado, it seemed like a good idea for her to go spinning around too. Not only that, but it's a challenge to find a way to use otherwise abandoned powers.
Jordan's Guide to Power Pools Page: 1 | 2 2 Power Pools - Teleportation & Leaping | 3 3 Power Pools - Flight & Leadership | 4 4 Power Pools - Medicine & Concealment | 5 5 Power Pools - Fighting & Presence
Jtag diagnostic: For best performance, put a 'no_image.gif' generic image for missing images in your root graphics folder Jtag diagnostic: For best performance, put a 'no_image.gif' generic image for missing images in your root graphics folder Jtag diagnostic: For best performance, put a 'no_image.gif' generic image for missing images in your root graphics folder NOTE! This page has not yet been adjusted for IOs and their affect on slotting and builds.
Sonic involves a lot of noise which some people find annoying, but I'm much happier with it because it's a themed character (Gale is supposed to be noisy). Anyway, sonic's secondary effect is lowered damage resistance. This helps you and your team by making the enemies easier to hit.
Some power combinations really don't work conceptually, but Storm (my primary) works with anything. Psychic Storm, yeah, I can see that. Radiation Storm? Dark Storm? Yup. It's all good. Mostly I chose sonic because it's a set that I wanted to try, but didn't think fit well with most of the other primaries. A raging noisy storm made perfect sense and thus, Screaming Gale.
Note that all power calculations have been normalized versus brawlTherefore, if a power is listed as being 200% the power of brawl and your brawl does 50 damage, then the power will do 100 to the same target. All powers on this page were tested against the exact same level of enemy and were unenhanced at the time.
Shriek
A basic low power attack It's nice that it has a secondary effect of lowering damage resistance because that means that the longer you fight, the more you hit your target. Actually… I don't know if the effect stacks… I need to test that.
| Unslotted Strength | | 300% of Brawl | |
For damage dealers with main attacks, the normal slotting is always one accuracy and three damage. For your defender, you can't do strong damage no matter what so save enhancments for other powers. If you find you have room, it never hurts to buff up your damage potential a bit.
Either way, make sure you always slot accuracy in your attacks. They're pretty pointless if they miss.
While in groups where the aggro is under control, make sure to hit each enemy one after the other (instead of trying to drop the same enemy over and over). By doing this, you are spreading out the damage resistnace effect.
Scream
Looks a lot like Shriek, but they used a different sound effect for it. As with all damage sets, the second attack does more damage than the first, but it works basically the same way.
| Unslotted Strength | | 389% of Brawl | |
Howl
Aren't AoE powers fun? You burst forth a cone shaped blast of sonic nastiness. It does pretty decent damage so I'd slot this attack for damage before Shriek and Scream. The major difference is that Howl doesn't drop damage resistance (which is a darned shame and why I didn't give it a 5 out of 5).
| Unslotted Strength | | 289% of Brawl | |
It's not too strong and it uses a decent chunk of endurance so try to save it for at least two enemies at a time.
Shockwave
If you took Storm Summoning as your primary like I did, you may find this unnecessary because of Gale. It's quite the opposite though. This power actually does decent damage so if you had to choose, this would be the one to take instead of Gale. However, because of my concept, I took both. If you're going to have all the knockback and positioning powers anyway, might as well have a backup in case Gale misses.
| Unslotted Strength | | 232% of Brawl | |
It's kind of neat to be able to start a battle by knocking everything into a corner while doing nearly as much damage as your first level attack. Best of all, enemies affected by Shockwave can't alpha you.
Shout
It's no different than Shriek or Scream, just more powerful. Note that it is a little shorter range though.
| Unslotted Strength | | 763% of Brawl | |
At this level of power, you should slot it to the max. It's well worth it.
Amplify
The description says it "greatly" increases accuracy and "slightly" improves damage potential for a short time. In tests, it was a little more than 1.5 times normal attack power.
| Damage Boost | | 153% of Brawl | |
As a Defender, you're not going to use this power to the same level as a Blaster would, but it does have it's uses. Last I checked, your pets get the bonus to accuracy and damage so if you use Amplify before summoning them, you give them at least those bonuses and might have time to launch a few attacks too.
The best use for this power is for making your Gale and Shockwave hit pretty much anything. By clicking Amplify before starting your battle, you're just not going to miss any of the enemies and positioning them will be much easier.
Siren's Song
http://www.jordans-town.com/graphics/guides/characters/gale/powers/sirens_song.jpg not found
Sleep powers are very unsexy because the enemies pop right out of it the second you hit them with something. While this can avoid an alpha, you can already do that by using a pet as a decoy (and you have two of those if you took Storm Summoning as your primary) or using either of your knockback powers (Gale and Shockwave).
Some less useful ways to use this power is to put a group to sleep so you and your whole team can sneak past them (kind of pointless if you use the Sneak and TP combo I recommended) or to put an entire group to sleep while your whole team uses only single target attacks to take out a particular problem enemy (like an av).
More likely, you could put down a couple of snipers or a second group that's attack your team or use it to make a hasty retreat when you find yourself in trouble. It may also be useful when soloing since your attacks are mostly single target anyway so the scenario I described above with your team that wasn't that good would be ok for you alone.
| Unslotted Strength | | Untested.. I'll get it the next time | |
If you're going to take it, make sure it doesn't miss. If you only care about putting some enemies to sleep and not others to cut down crowd size, one accuracy enhancement might be enough.
Note that I think Thunderclap from the Storm Summoning set is a better power because it causes stun instead. If I get the chance, I'll test this more thoroughly.
Screech
http://www.jordans-town.com/graphics/guides/characters/gale/powers/screech.jpg not found
A single target disorient. Hmm. If you are dead set on playing pvp, this could be useful to you, but in the real game, I'm thinking it's kind of redundant with the superior Thunder Clap power from your primary.
If you're going to take it, make sure it doesn't miss.
Dreadful Wail
http://www.jordans-town.com/graphics/guides/characters/gale/powers/dreadful_wail.jpg not found
I never got high enough level to play with this nova, but I bet it's awesome.
| Unslotted Strength | | Unknown… | |
In theory, nova powers don't miss. If you find that it does, replace one of the recharges with accuracy.
Summary
For defender secondaries, Sonic is not bad. Having played a D3 Defender, I could keep the enemies from hitting me, but damaging them was much tougher. With powers that not only do a really good amount of damage, but also reduce their resistance to further damage as a secondary effect, I can actually dish it out pretty well for once.
Screaming Gale's Storm/Sonic Defender Guide Page: 1 | 2 2 All About Storm/Sonic Defenders | 3 3 Storm/Sonic Defender Powers | 4 4 Gale's Storm Summoning Guide | 5 | 6
Next Page »
|
 |


 >
>