

All About Archetypes

The at you choose will determines what kind of powers you will have and what your major style of gameplay will be. Here is a quick summary of the typical role each AT (a section on powers follows):
Note: I KNOW already! Yes, you can play any character any way. If you try hard, you can make a super-tough defender and play them like a tank. However, most people don't and the game isn't going to make it easy for you. Therefore, I'm going to explain this how it's done normally. This is a guide for newer players after all.
Heroes
 Tanker

I can take you all!
Their job is to hold Aggro and survive as best they can while the rest of the group beats the tar out of whatever enemies are around. In short, their job is being tough. A tank will take a bat to the knee, a gunshot to the chest, and an axe to the head while his player is off taking a potty break with no problems.
Note that playing solo can be slow because of the low damage that most tanks do, but since dying is more rare (especially at high levels), Tanks rarely have to make frequent trips back and forth from the hospital to a tough mission.
Auto-power: Guantlet
Every time you hit an enemy, it and surrounding enemies are hit with a light taunt effect. This fits very well with the tank philosophy of "Hey! Bad guy! Leave those squishies alone". All you have to do is keep switching targets to keep them fully occupied on you. Having an AoE attack is especially useful for Tanks who want to keep their team safe.
 Blaster
These are the mass destruction characters of the game. They are often the pullers because of their long range attacks and they're good for nailing flying foes, one's stuck in the ceiling, or runners. They also have the most aoe damage which is very fun, but also dangerous in that it draws aggro from anyone else (like the tank) directly to you. Being extremely squishy, it's important to use hit-and-run tactics, use the terrain to prevent being overwhelmed, or use the strengths of team members to stay alive.
Balancing the massive ranged power of the blaster without getting killed can be challenging and many people don't do it well. I have often teamed with blasters who really helped the team and were critical to the success of missions and tfs, while other times, vast pain and agony were the result of teaming with a "bad" blaster. The key is to be careful about the blasters on your team. A dumb tank will only get themselves killed while a dumb blaster will get everyone else killed.
Auto-power: Defiance
Woot!! They finally changed this worthless power into something useful. Forget what it used to do and let's focus on what it does now.
Not only can you use the first two powers of your primary powerset and the first power of your secondary while Mezzed, but every attack you perform from your primary and secondary (not pools or temp powers) adds a temporary bonus to your attack power (which can get insanely high after a while). Now that's a cool inherent power.
 Controller

Crowd Control. With a strong controller, it's possible to be effective without a tank because the enemies will be frozen, confused, held or whatever. This can be dangerous though. Because Controllers have low damage output, they can't kill a huge crowd before the holds wear off. Therefore, if they try to take on too many solo, it can get them into trouble. Likewise, if the team they're with doesn't fully take the aggro by the time the hold wears off, the entire room of bad guys will come looking for the 'Troller.
Auto-power: Containment
As far as auto powers go, this is one of the most useful. A controller automatically doubles damage dealt to any enemy that is under a control power's effect (such as holds, slows, confuse, etc.). Since controllers attacks are usually a hold, slow, sleep etc anyway, then pretty much all their attacks hit double.
 Defender

The Everything Character. I really like defenders because they have a good balance of attack/control and healing/support powers. A defender helps the team by altering the rules of play. Defender powers can provide team protection, weaken the enemy, provide healing, improve the stats of other players temporarily etc.
For example, one time while fighting a high-level Psionic powered av, my team found that he did about half damage with me around because of the defense bonus my character added to the team and the accuracy pentalty I applied to him.
It's interesting to note that the controller's secondary powers are the primary power sets for defenders. Because of this, there can be a lot of overlap in the duties of controllers and defenders, but generally, controllers are crowd control/team support and defenders are team support/enemy manipulation.
Auto-power: Vigilance
As team member's life totals fall, a Defender uses less endurance. This is very useful IF you're on a team and IF they're dying. This used to be a fairly so-so power until…
 | The newest update in i17 ALSO includes a damage bonus when soloing of up to 30%. This significantly helps Defenders solo or when on small teams (though the bonus is effectively nullified with a team of 3 or more). |
 Scrapper

High damage, medium hit points. The scrapper's primary job during a team battle is to add damage to what the tank does and take out the problem enemies quickly. They are strongest when fighting one or two enemies at a time, but can dish out more damage than anyone (even blasters) to a single target. Because they are also decently tough, they can take enemies far above their level.
It should be noted that for people who either don't have the skill or the desire to worry about other team mates or complications like Aggro, Scrappers make a very good first character. This is also good for impatient people who just want to get out there and kills stuff.
Auto-power: Critical Hit
A portion of scrapper attacks will be critical hits which do double damage. Because of this, taking powers that hit multiple time such as Dark Maul (for Dark Melee scrappers) will give you better chances for landing criticals. Note that you have a better chance for critical when fighting tougher enemies.
Kheldians(  Peacebringer /
  Warshade )


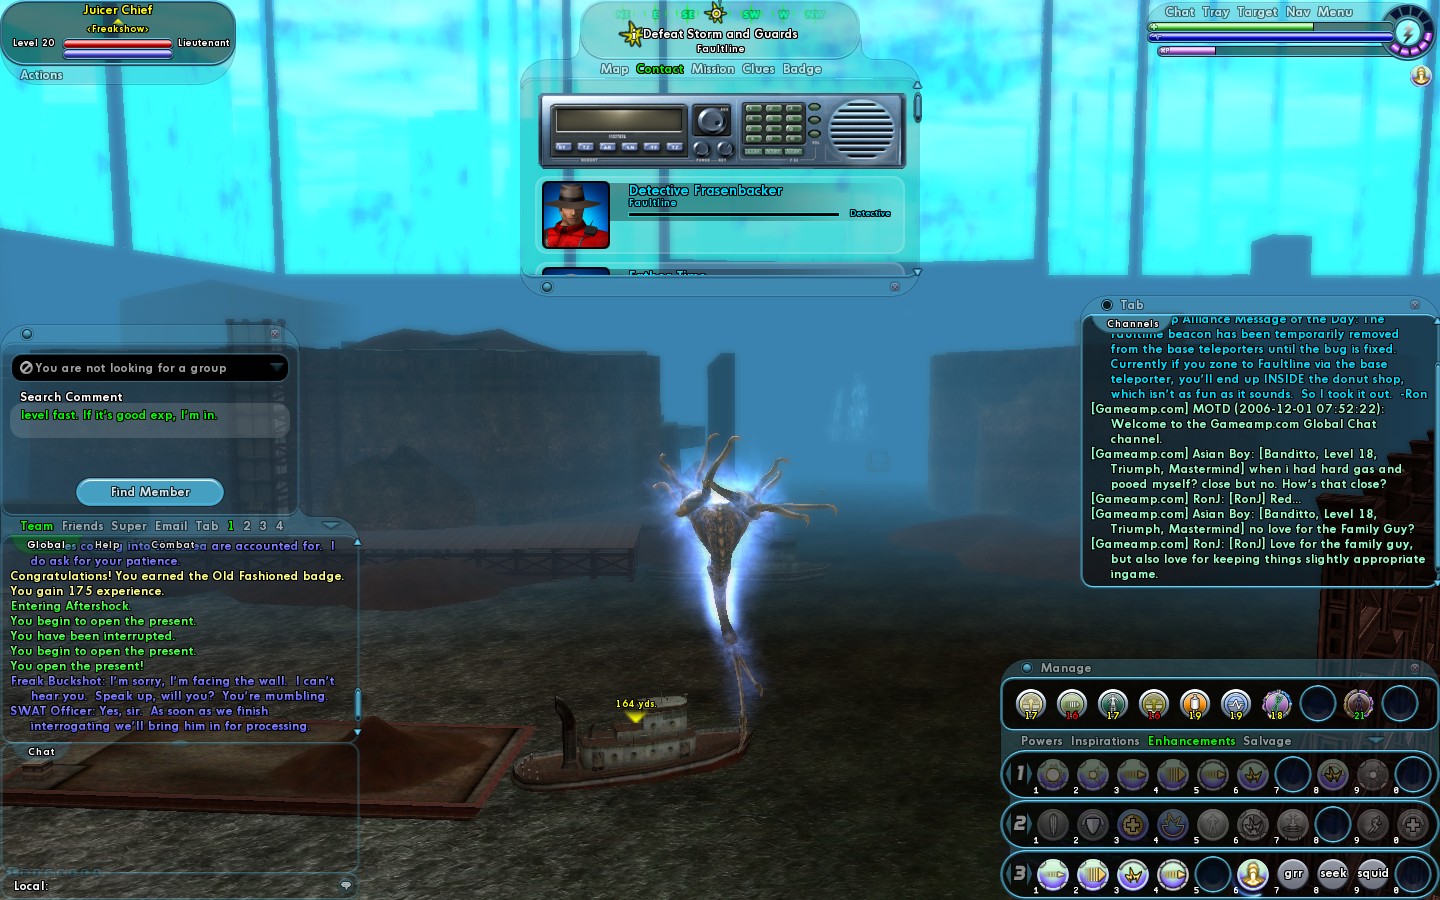
These odd character types are often seen as flying squid-like things. Each type has a large amount of abilities to choose from (far more than the other ATs, though I think all types should have this many powers or more), and some very cool inherent powers.
To play one, you first have to have at least one of your other characters on any server at level 50 20 (I think it was kind of cheap to change it to level 20, but whatever…).
Of note are the three major forms: human, nova, and dwarf. Human is normal and has the most variety of power while nova is the flying form I talked about before. Novas have great attack but no defense. Dwarfs are large bulky looking things that look more like giant lobsters and have the characteristics of a tank. Because of this, Kheldians have some of the best versatility as far as team members go

Auto-power:
Depending on the team member archetypes that are with a Kheldian, they gain bonuses to attack, defense, and resistances. For this reason, Kheldians benefit by joining a team of diverse archetypes. Also, Peacebringers have Fly from level 1 and Warshades have Teleport.
Villains
 Brute
Brute

Brutes are like a cross between scrappers and tanks. Their powersets are mostly the same as Tanks, but they can't hold Aggro as well. Instead, they get a damage buff for each enemy that surrounds them making them both very tough and very powerful.
Auto-power: Fury
Brutes have a fury bar which raises attack power the more full the bar gets. Staying in active battle and being surrounded by multiple enemies raises your fury bar.
 Corruptor

A Corruptor is a cross between a Blaster and Defender. They have strong ranged attacks (though weaker than a Blaster), and healing/support secondaries (mostly the same as the ones Defenders have).
If you've played Defenders, but were frustrated by their lack of punch or if you've played a Blaster and wished you could survive a little better, a Corruptor is a great type to play. You can do good damage, but with debuffs/heals, you can keep yourself alive much better than a Blaster.
Auto-power: Scourge
Scourge is a really neat power that does double damage to enemies who are below 50% life. If you are fighting a tough enemy, but can get him down below 50%, your damage accelerates greatly. Even better, the chance for Scourge becomes much greater the lower in life the enemy gets.
 Brute
Brute

Dominators are a mix between Controllers and Blasters. Their primary power sets are just like Controllers which are used to hold and control enemies. Their secondary powers are all ranged attacks like a blaster.
Auto-power: Domination
Dominators have a "Domination" bar that grows with the more control powers they use. Once the bar is mostly full, you can activate your domination (a power in your tray). While the effect is active, your holds and controls are more effective and deal more damage.
 Mastermind
Masterminds have Defender secondaries (heals, buffs/debuffs), but what really makes them cool is their primary. Their primary powers are completely unique among all archetypes (hero and villainside) and consist mostly of henchmen and powers that work with them.
They can be a bit complicated to play if you want to control your pets with fine detail, but a good set of binds makes that far easier. Even without binds, you can control them with the custom pet controls that Masterminds have access to.
Auto-power: Supremacy
Being pet-oriented, Masterminds give a bonus to attack and to-hit to any nearby pets.
 Stalker
I'm right in front of you!!
Stalkers are scrappers that have two powers replaced by the Stalker-specific Hide (which renders you fully invisible and you have access to from level 1), and Assassin's Strike which is a ridiculously powerful single-target power (which you get at level 6).
It's pretty cool to have full invisibility from level one, but being far weaker in defense compared to scrappers makes them a bit more challenging to play.
Auto-power: Assassination
Stalkers do critical damage whenever they're hidden and have a chance for critical when their not.
 Arachnos Widow /
  Arachnos Widow

We're leaving!
Spyder's Attendant: Yes Miss Webb.
A soldier starts out something like a tough Assault Rifle Blaster with a strong team buff and defensive secondary. The Widow is a Claws scrapper with the same type of defensive secondary.
When each reaches 24, they are given a choice of which path to follow. For soldiers, they can become Crab Spiders or Bane Spiders. Widows can become Fortunas or Blood Widows. The main difference between the two is ranged attacks (Crab and Fortuna) versus melee with stealth (Bane and Blood).
To unlock this character type, you need to get a character to 50 20 just like the hero epic sorta-epic archetypes.
Auto-power: Conditioning
Higher base endurance and health recovery than other types.
Basic Binds
Here are a bunch of really good binds that I use all the time. They should be useful no matter what type of character you use
This lets you hit [ and ] one after another to do a Three Stooges-esque slap back and forth across someone's face (or butt if your character is short and theirs is tall).
/bind f5 "em welcome$$team <color #ffffff><bgcolor #000000>Welcome!"
Used to welcome a new member to a team. I said it so often, I put it on a bind. For any bind that involves speaking, I make sure the color values match the chat bubble colors I chose before. Note that it's actually easier to chose these first and match the chat bubble to IT rather than the other way around.
/bind f6 "em clap$$local <color white><bgcolor yellow>Gratz!"
Tired of typing "gratz" in the middle of battle when someone dings? Now it's just one button and includes an emote and custom colors. Note that the emote does not affect your fighting so go ahead and do it in battle 🙂
/bind f7 "em point$$local <color #ffffff><bgcolor #000000>Bring it!$$team <color blackgt;<bgcolor green>Ready!"
Here all I've done is add an emote (other than the default thumbsup) and some local text that theoretically will match the character of the hero/villain I'm playing at the time. I tried just replacing the "Ready" text, but it confused people so I put custom text in local instead.
/bind f8 "local <color #ffffff><bgcolor #000000>Ick! It's a $target"
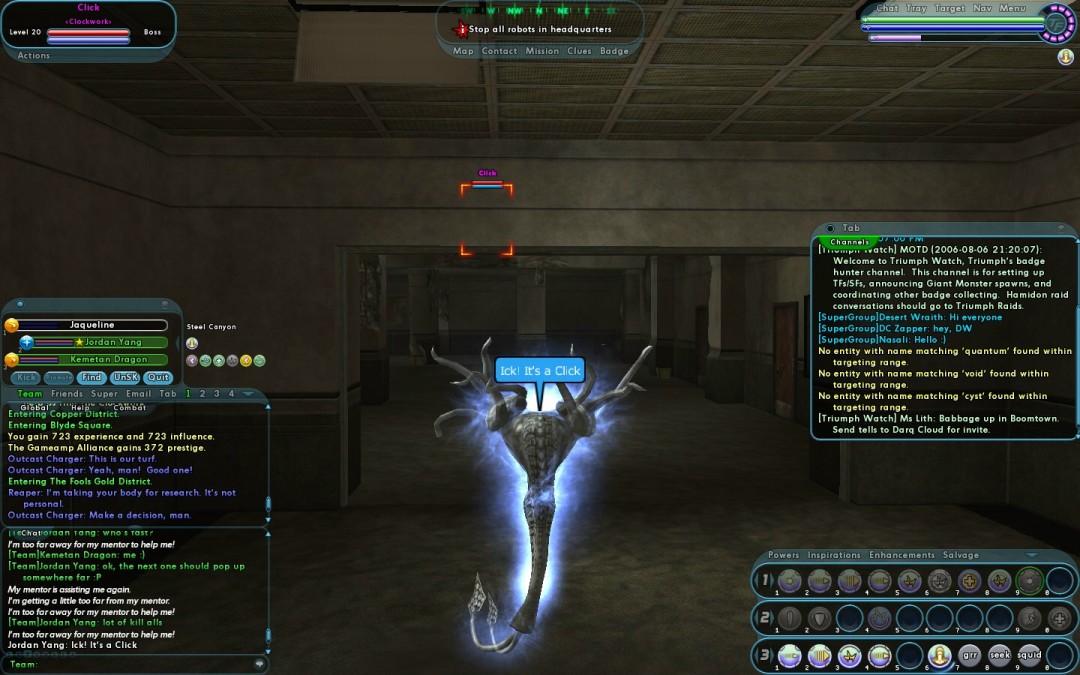
The goal here is to point out to the team that there's an enemy of particular importance. Either that or something interesting or useful. Here are some examples:
- Ick! It's a Void Slayer!
- Ick! It's a Hostage
- Ick! It's a Superdine Case
/bind enter "afk Whoah! I gotta think about this$$startchat"
This is that cool bind you've probably seen others do that puts a little bubble with text over their head when they're typing. The way it works is that instead of clicking on the chat window to talk, just hit the enter button. This will put you afk with your custom message while you type. Then just hit enter again to say whatever you wanted to say.
SPECIAL MACRO!!
I actually use a Seek Bind for this now as it works much better, but I'll leave this section here for those who find it useful
/macro seek "target_name ich"
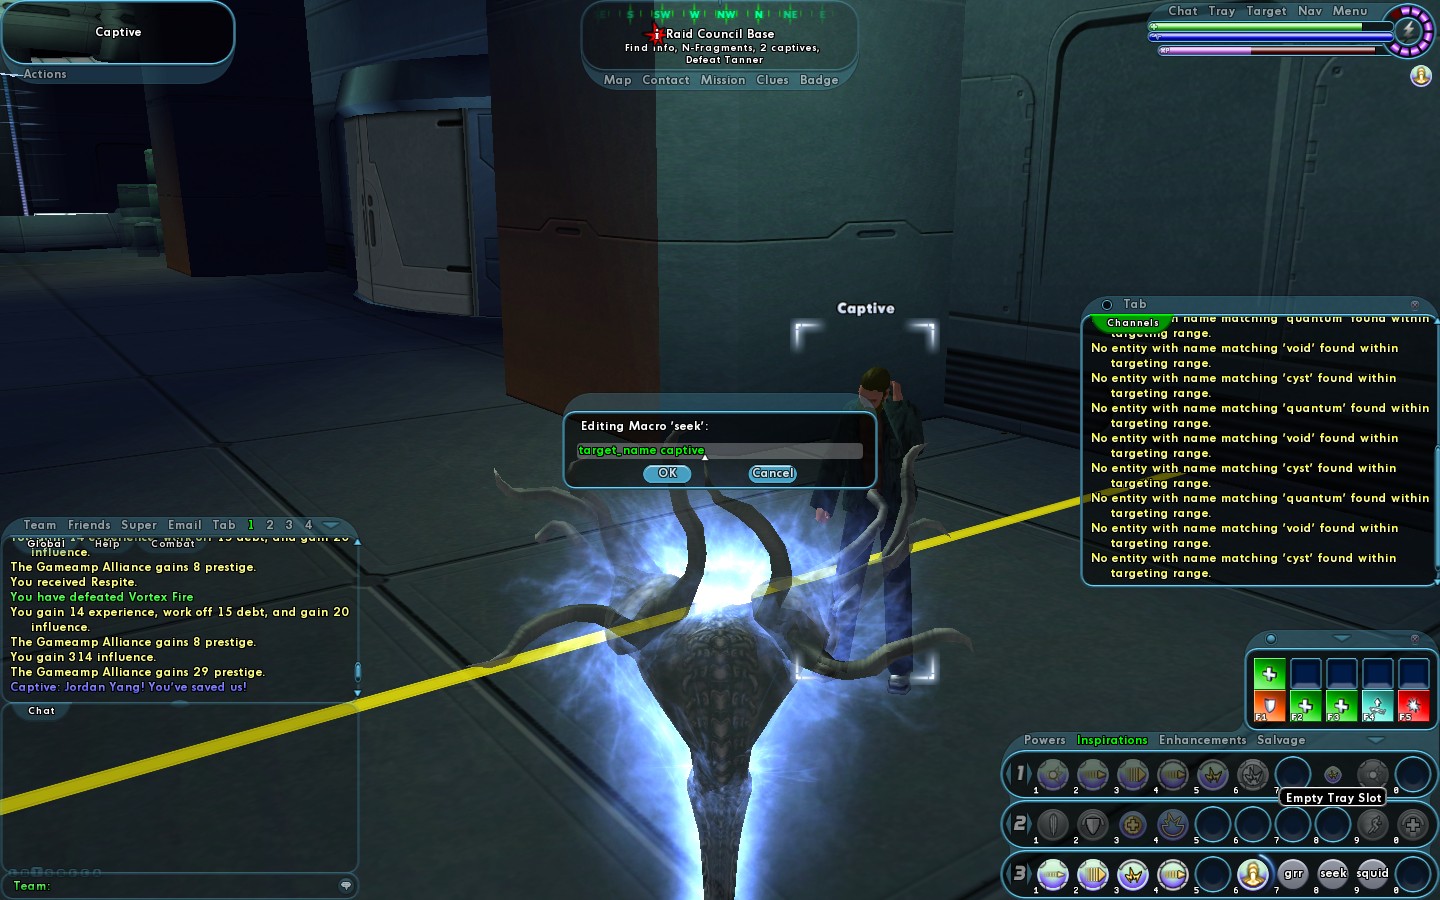
This very important scouting macro must be a macro because you need to change it often and changing a macro is easily done by right-clicking it and selecting edit (much easier than binds). The way this works is it will ONLY target anything on the screen with the letters in their name that match what you put in. For this example "ich", only characters/enemies with names like "Micheal", "Michelle", etc. will be targeted.
NOW, if you're paying attention, you'll realize you can also write things like "target_name captive" for "find captive" missions, "target_name eton" for "find Detonator" missions, and "target_name quip" for "protect Lab Equipment" missions. Anyone who's played a lot (which you should have by now if you have a Kheldian), knows how frustrating it is to find certain targets sometimes. This macro helps A LOT! And when the target changes or you have a different mission, just change the macro.
Note: I put this particular macro in my Nova tray because flying around is generally the best way to look around for stuff.
Jeremy’s Contacts Guide
The first thing you'll do once you enter the game is be introduced to your first contact. Contacts are your non-player characters (NPC's) that are listed in your contacts menu (which is on your navigation bar). They give you missions and lead you through the various story plots in the game.
Here are my tips for making the most out of your contacts:
Story lines
Most contacts will offer you a choice of missions to take. One will usually follow a story line while the other is just to keep you busy. ALWAYS take the story line mission. Completing a story arc will give you experience and enhancement bonuses and can bring you into battles with special enemies such as Arch-Villains.
Note that the story mission can be any type of mission (mission types explained later), the key is to read the description and determine which option sounds like it continues the plot. Even if you make the wrong choice, you can usually still take the mission as long as you don't out-level the contact before you finish the arc.
Maximize your contacts
Though you could finish all the missions for one contact at a time, you will spend a lot of time running around and see less of the game. Granted, you could just Roll another character and see some of what you missed that way, but if you're a casual gamer trying to maximize your time, you'll complete as many story arcs as you can in one run.
Note that with Flashbacks, you can replay many missions you missed the first time through.
Keep as many active missions from different contacts as you can which at the time of this writing is three seven. In doing this, you will often get compatible missions. Here are some examples:
- Your contacts give you two to three missions in the same zone.
- You have a mission to "kill 10 Hellions" and a door mission full of Hellions.
- You have two missions at the same time to kill "10 Hellions" and "15 Hellions" in which each kill will count for both missions.
- Your zone 1 contact keeps giving missions in zone 2, and zone 2 contact gives you mission for zone 1 so, though you have to travel, it's not as much of a waste.
Don't out-Level your contacts
Every contact has a level range. If you try to contact one contact when you're too low, they'll say that you must be a certain security level (level) before you can take any of their missions. If you gain enough levels and pass their range, they'll thank you for your help, but say that you've cleared them of missions (which won't be true, but they won't let you take any missions just the same). The trick is to not out-level your contact before you've completed their story arc.
Don't walk when you can call
Most contacts will give you their "cell" number after a few missions. As soon as they do, start calling them instead of running all the way back to saves valuable time. To "call", open the contacts menu and press the CALL button next to the info for that contact. If there is no CALL button, you haven't done enough missions for them yet.
Pick your referrals carefully
When you have done a certain amount of missions for a contact, they will either introduce you to a new contact or give you a choice between a few different people. Choosing a referral is an important way to control your travel through the story plots in the game.
Unless you have a reason to pick otherwise, alway choose ones that match your type so that when they offer you enhancements, they're the kind you can use. For example, I chose to be of magic nature during character creation (as opposed to technology, mutation, etc). By sticking with missions and contacts of a more magical nature, I will get enhancements that I can use. This becomes important later when you begin to get dual origin and single origin enhancements.
The only reason to choose otherwise is avoid enemy types you don't like or story plots you've followed before.
| Of course, now that there's IOs, you might disregard this advice entirely. It's up to you. |
Special Cases
Kheldian Contacts
Kheldians have special contacts that lead them through a story line that spans all 50 levels. Every 5 levels, there's a new story arc that consists of about 5 missions or so. Villain epics have a similar set of custom contacts.
Costume and Store Contacts
Some stores in Brickstown and Founder's Falls can only be accessed after you do a single mission for them. The same is true of the various Tailors around the game. Similarly, the City Representative in atlas will require you to complete a few missions to unlock capes or auras for use in costume design (for example, Shazel's flaming hair).
Self-contained zone contacts
There are certain zones which are entirely self contained. These tend to have better story plots and bigger bonuses than the others (partially because they're newer) as well as custom TFs. The best part of working with these contacts is that you never have to leave the zone which helps reduce wasting time travelling from place to place.
As of this writing, the self-contained zones in City of Heroes are The Hollows, Faultline, Striga Island, and Croatoa. Most Villain zones are already self-contained.
Door Missions
As of issue 13, the mission objectives generally match one or more of the following:
Find crate/box/equipment
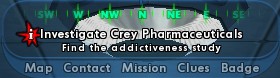 Gotta find that study!
These are easy if you have stealth powers. You just run around, find the Glowies and click on them. You can also hear the glowies from a decent distance away and with good speakers or headphones can tell its direction and distance very well with practice.
Be careful though because while you're messing with a crate or computer, enemies that are very close will still notice you. A few tips for dealing with this is to hold, confuse, or distract nearby enemies with a pet until you're done and then run away. If you do use a pet, be sure to dismiss it before running to the next area or he'll bring Aggro with him.
Note that later missions are a lot trickier with their objectives. This particular example just says to find the study, but it also had several desks that needed to be protected.
Destroy crates/boxes/equipment
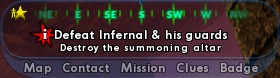 To complete this mission, I also have to destroy the altar
You must find and destroy some in-animate thing(s). These are not the same as glowies because they don't glow and they don't make noise. You must actually target all crate-looking things and hope it's the one you want. If it is, you will see a life bar like any other enemy and you whack on it until it explodes or is otherwise destroyed. These can be a total pain to locate and enemies are usually stacked around the object making these missions not much faster than a "kill all".
 Missions like this are a good time to use my Seek Bind
Protect crates/boxes/equipment
 Some guys hanging around a desk.
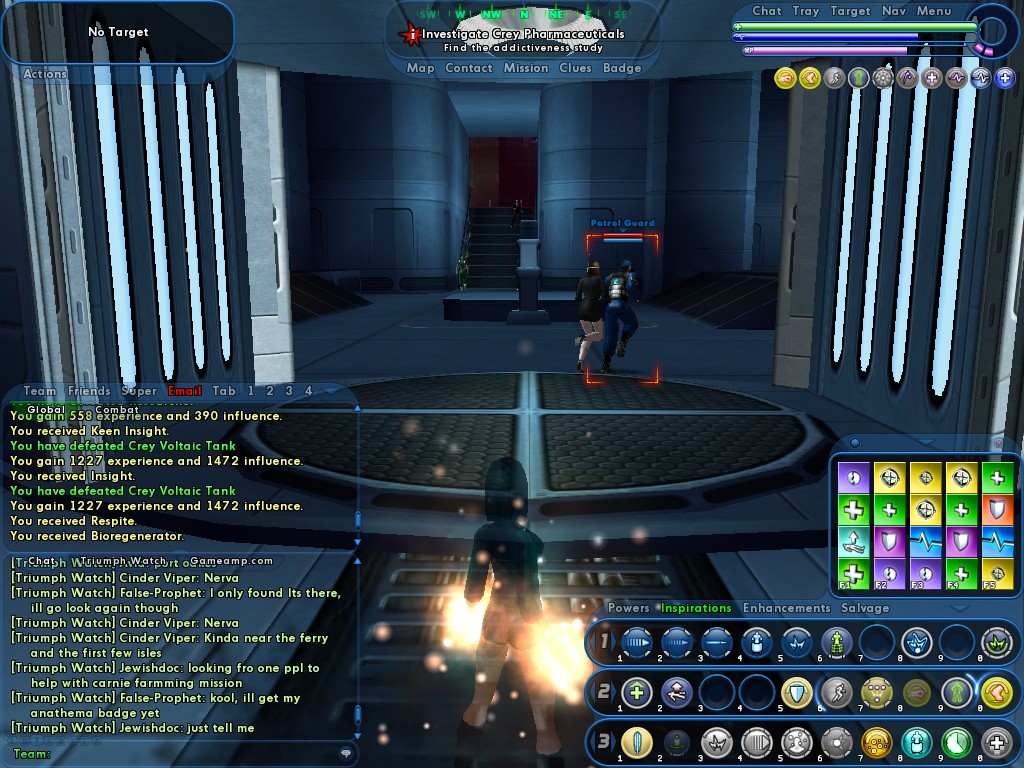 Where are they going?Back to destroy that desk of course...
You must find and save some in-animate thing(s) from destruction in some cases, the enemy is standing around the thing and won't attack it until you come close and in others, when you get near the thing, it will trigger waves of attacks from enemies who will head straight for the target unless you get their attention.
This is a newer mission element and makes things more interesting, but is still a little buggy as of issue 6. Sometimes the waves don't show up for a long time and you leave to see what you missed only to find that they snuck by you somehow and destroyed the thing anyway.
In other cases, the enemies are unholy-focused on the object no matter what you do preventing you from completing your objective. These missions can be frustrating for that reasons so beware.
In Croatoa, the last mission in the arc by Skipper is to protect a henge or such, but the enemies completely ignore you most times making it nearly impossible to beat alone. I almost always hold my mission completion for this mission because of it.Kill leader and crew
 Nuons are weak! Ha ha ha!
You will go to a warehouse/cave/lab and have to find and destroy the leader and the people closest to him. The leader is usually in the furthest place from the entrance (highest floor, deepest cave, furthest room) and they will almost always talk when you get near them which causes his name to appear in your global chat box (which should match the name listed in the mission goal). Even if they don't talk (as they often don't in the later levels), you can point at each enemy with the mouse and it will show their name (or use a Seek Bind if you know their name).
Sometimes it just says "kill leader" in the mission goal and doesn't give you a special named enemy to look for (usually in later levels). You can try to guess which one it is or if you're lucky, they'll have a special (non-generic) name, but the simplest thing to do is sneak or just run to the end of the mission (if you're tough enough) and start clearing it from the back (since the boss is usually at the very back).
If you've killed the leader and the mission hasn't ended, first check to see if there was another mission task you hadn't completed yet then start clearing the mission from the location of the leader. Usually it's because you missed one of "his men" and as soon as you kill them, the mission will end.
There's a newer feature that is supposed to show you the final objective(s) for the mission if you've completed most of the others. I would guess this is to reduce the number of requests for help they get from someone who lost track of a Runner or such.
Rescue Hostages
 Rescue 3 generic NPCs
You will be told how many hostages to find and they're pretty easy to spot by the behavior of the enemies standing in front of the hostage. There are always between two and three and they act in a "we have a hostage" kind of way. You will pick up on this very quickly.
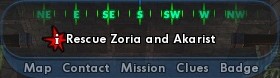 In this case, the hostages have names
These can be good because you only have to rescue the hostages, but depending on the density of the enemies and the difficulty of finding some of those danged hostages, this kind will often become a "Kill all". This is because you will sometimes not be able to extract the hostages without attracting the other enemies or because there's a hostage hidden so well, that if you don't kill everything, you'll never be able to keep track of where you've been and where you haven't.
Escort/Kidnap Hostages
This is the same as a hostage mission except that once you save them, you have to actually lead them to the mission exit. This really sucks because you not only have to go all the way back to the beginning, but you get ambushed a few times on the way.
There's no way to tell ahead of time if a rescue mission will require an escort or not. You just have to save them and see. But keep in mind that ANY Radio mission that includes the word "Rescue" in the title is an escort mission (same for Villain kidnap missions)
The only good thing about escorting is that sometimes the NPC will help! For example, the fortuneteller mission used to be a simple rescue and is now an escort, but she uses powers to fight with you on the way. It makes the mission much more interesting than it used to be (though sometimes the NPC dies and you fail so be careful).
"Kill (arrest) all" missions
 Mass destruction! Whee!
These are the "if it moves, kill it" kind of mission and are about the most aggravating when you're trying to get through quickly for a mission bonus. If you're playing a squishy character type, this can take a while (though changes to inherent powers for controllers and defenders and the advanced difficulty control has helped).
To make the most of it, form a quick team. You will be able to move quicker and get better experience by bringing along more people. This is particularly important if you're trying to get it done in a hurry. For example, if dinner is starting and you suddenly find that you took timed kill all mission, you better get some help if you want to finish it without drawing family aggro
Note that in "kill all" missions, most other mission tasks don't matter anymore. This is because if you kill everything, you'll have rescued everyone, found all glowies, defeated all "leaders", and protected or destroyed any objects.
If you find that you're having trouble getting through missions with any kind of speed, try lowering your Mission Difficulty (Noteriety)Simultaneous Action
There are very few missions like this, but they require a certain number of team members to complete. The goal is to find the glowies, but you and your team have to touch them at the same time. The story is usually something like having to disarm two bombs at the same time or hacking into a computer system using three terminals at the same time.
The key thing to note here is that you MUST have teammates with you (or a second account it.
Special Topics
Timed Missions
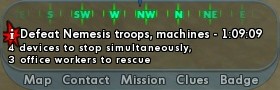
Time is running out... One hour and 9 minutes remaining.Timed missions are a real pain because you can't walk away from them and finish later (which busy people with real lives might have to do now and then). They're really not a problem as long as you don't have to suddenly deal with a family issue (like the kid just wet their pants or the wife is burning the kitchen to the ground).
For example, there was one time I didn't realize I had a two part mission. At the end of the first one, a second timed mission began automatically. I finished a different mission that had been waiting and checked for the next one and saw that I only had 8 minutes left to finish the second part of the first mission that I didn't know I had.
 Oh, hell no!
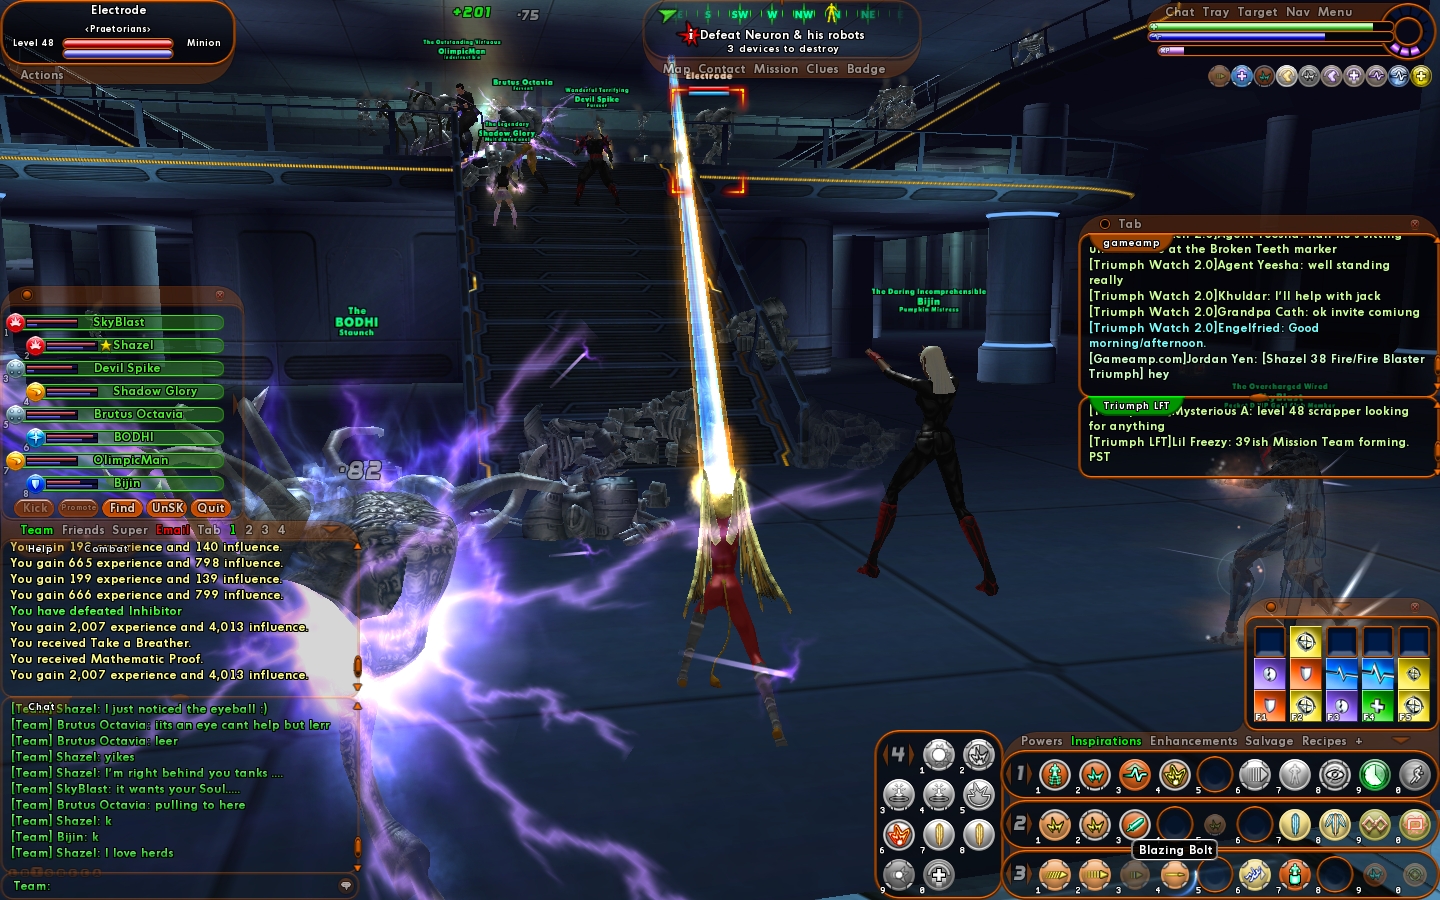
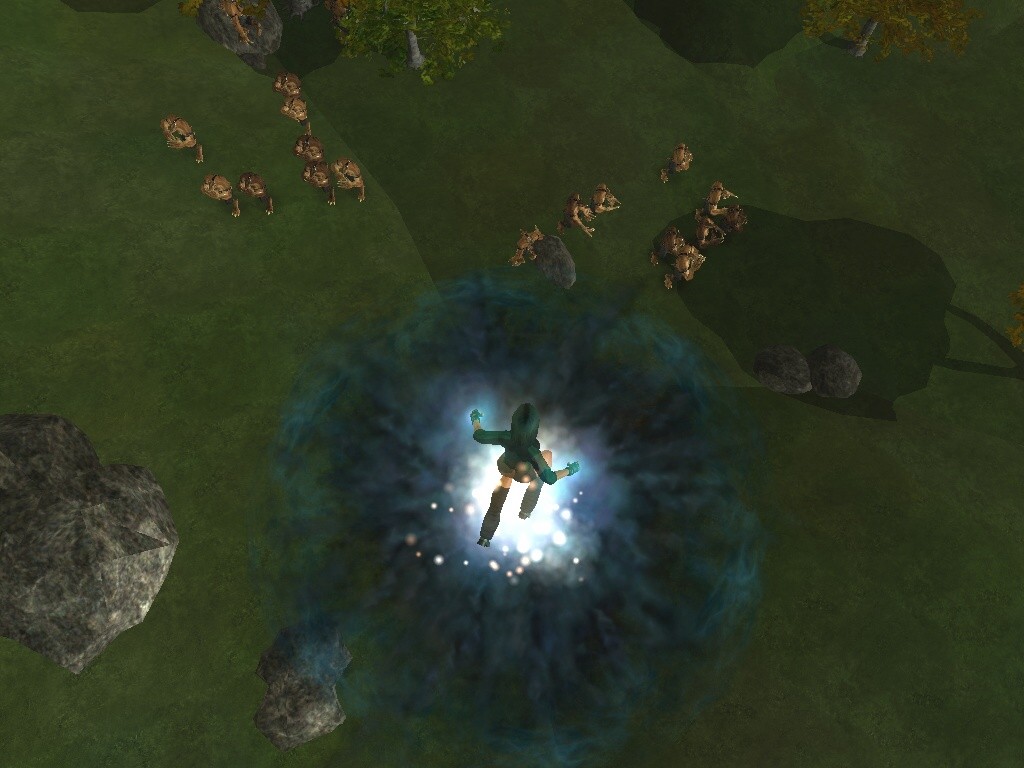
Even then, because I had stealth powers, I was able to get to the mission and finish it in time. The challenge comes later when the time limits get smaller and the mission gets tougher. For example, in the figure here, you see wolves. Lots of them. As a defender, there's no way I can take that many alone.
As it was, only with the help of a higher level tank who worked really fast was I able to complete the mission (barely) in time.
Also keep in mind that the timer runs from the time you accept the mission. If you discover you need to form a team, the time will keep running.Train missions
To get to these missions, you go to any train in any zone and click on it like you were going to go to a different zone and your mission will be listed there. You will be taken to a small section of a normal city zone which is walled off with a blue force field where you will do your mission (which can have any combination of the objectives above).
This is hard as heck because a warehouse/lab/cave mission is very linear and well mapped, but in these missions, stuff is even harder to find. I've circled around for long periods of time trying to find that last glowie or the the last enemy in a "kill all". These missions are easy to Sneak, but can take a really long time.
On the other hand, one advantage to a train mission is the lack of travel time. If you put together a team, they can go to the nearest train rather than come to your zone. When you've finished the mission, everyone goes back to the zone they came from which helps them resume where they left off if they don't want to stay with the team after completing the misison.
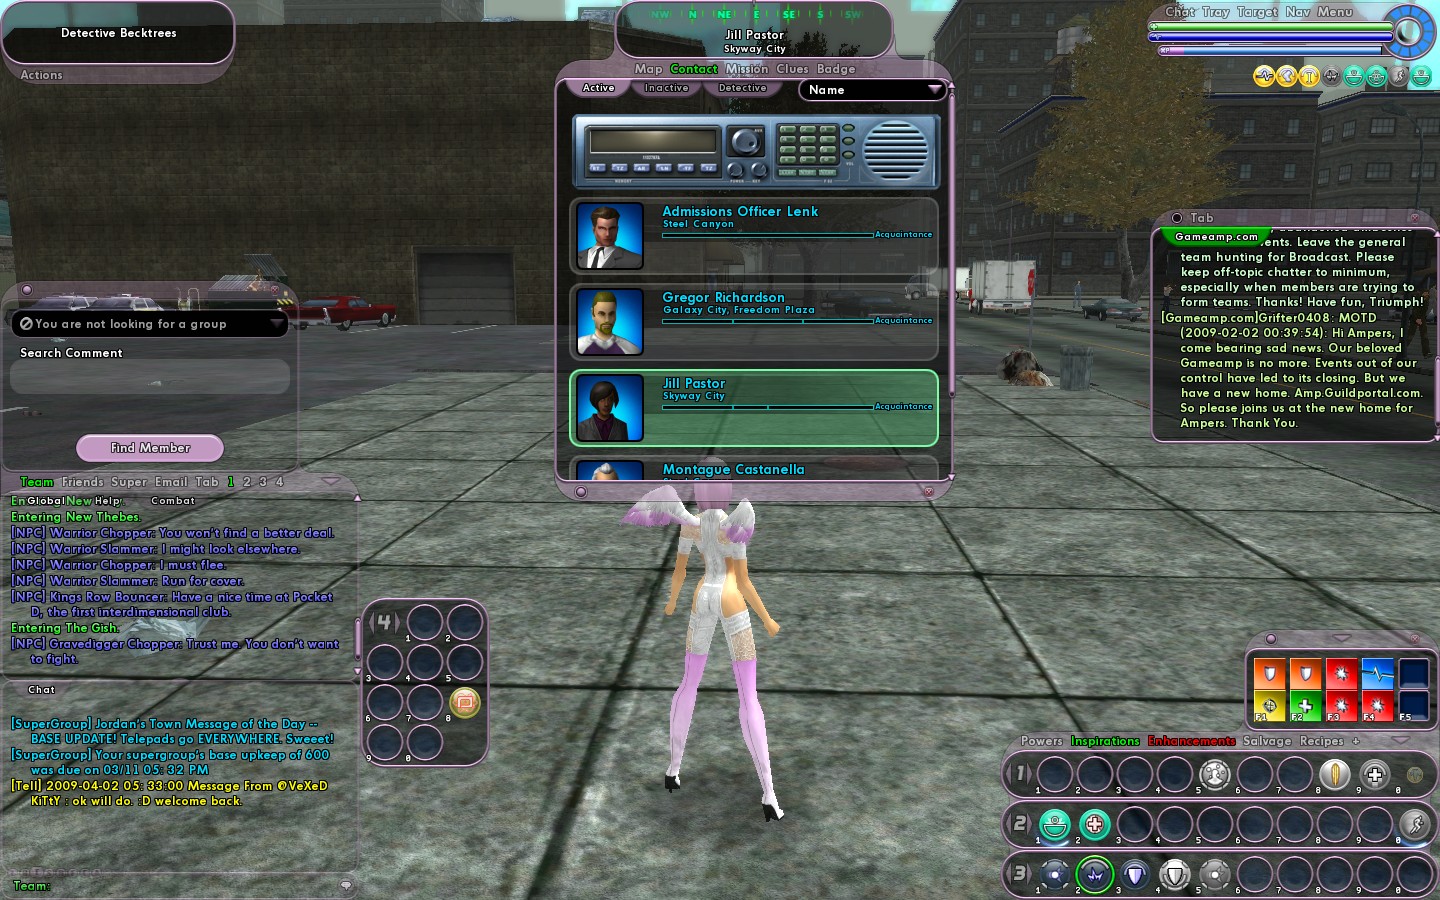
Even better, you can access train missions from OuroborosPolice Band Missions
 A police scanner is one of your contacts now.
To be able to do these, you need to get a scanner. Once you have it, you can just listen to the scanner to get a mission. The missions are random, but you get to choose from three possible options (so you can skip those annoying rescue missions for example).
There's no story plot to these, but once you've done three to five in a zone, you'll get a Safeguard mission. The best parts of this is that the missions are always in the same zone and you never have to run to a contact for them. They're also easy to drop for the same reason.
Replace radio with newspaper and Safeguard with Mayhem for Villains, but it works the exact same way.
Jeremy’s Missions Guide
Why do missions
Two major objectives of CoH/V are to level to the max and fully customize your character into a god-like purity and to enjoy the ride by beating down the forces of evil (or good) along the way.
You can certainly go around randomly and fight things until you level, but it's much slower and a lot more boring than doing missions.
Missions get you several important bonuses:
- Every mission has a completion bonus for experience and influence.
- If you follow the story arcs through the missions, you get an experience bonus as well as merits for a reward.
- Many very cool maps and enemies can only be found in missions or TFs
How to do missions
There are three ways to go through missions.
-
Form a team and clear it.
The biggest advantage to this method is that you can get the fastest DPS in the game. You will also get to hang out with people which is part of what makes the game fun (assuming you are in a good team (read my Jordan's Teaming Guide for advice on this).
-
Clear it yourself
For certain ATs, beating everything in a mission by themselves works very well, but for Squishies, this can be grueling and slow.
-
Sneak it
If you have stealth powers, you can sneak through most missions and complete the objectives without fighting everything. For a squishy character who either doesn't want to team or couldn't find a good team, this is a great option.
Getting to missions
Travel is slow and grueling at low levels and can be at higher levels too (especially when a TF or contact sends you all over the place). Make sure to read my Jeremy's Advanced Travel Guide guide for some advice on making this easier.
 You can see the mission marked on the map and the screen pointer showing the exact door to enter.
Your current mission is listed in the navigation bar though you can also access your current missions by clicking on the "Missions" menu (also located on the navigation bar). The default location for the nav bar is the top center of the screen.
When you're in the correct zone, a marker will show up on your navigation screen and on the zone map making it very easy to get to the right entrance (just follow the red or yellow arrow).
There are some missions that take place in holes in the ground that you might not see if your graphics settings are too low. If you see the red/yellow arrow pointing straight to the ground, try clicking it. The entrance might actually be there.
Now that you've met your contacts, got your missions, and found the missions, you need to know what to do with with them.
All About Origins
There are five origins in the game each of which describes a different way that your hero gained their powers. Information about the significance of origin selection is very hard to find so here's a nice consolidated explanation:
-
Later in the game, you will get enhancements that are dual origin and single origin. If you want to get useful enhancements from the enemies you're fighting, you'll want to take missions from certain contacts and fight certain kinds of enemies.
For example, if you are of magic origin, fighting CoT will give you magic enhancements, but not fighting nemesis. You'll find that you fill up on enhancements very quickly when you never get any you can use during a mission. Therefore, you'll often want to follow contacts and story lines that match with your origin.
Note that this hardly matters if you use IOs and ignore standard enhancements like i do
-
Your origin determines your initial contact who will direct you to missions that are aligned with that origin. While later on, you can make choices that change the way you play the game, origin does determine, to a small degree, the story arc you take through the game and the first enemies you'll fight. See here for the full listing of early enemies as well as their resistances and weaknesses.
- Recently, the devs added a temporary power based on your origin that you keep until level 10. They are designed to help you during the early part of the game and could accent your character design (powers described below).
About the only for most of these powers after level 10 is if you are Badge hunting and need to be able to Aggro an enemy that's extremely below your level without killing him. Otherwise, i would never pick any character based on this alone.
The origins are:
 Natural
A natural hero is either highly trained or is a member of an elite group or alien race where all of their kind have this type of power.
Temp power – throwing knife. Does a small amount of ranged damage.
Early enemy – Council. Especially at low levels, council are a simple type of enemy to fight. They are good for beginners to face off against, but might not be as fun to fight as some of the other groups.
 Science
A science experiment or accident caused the manifestation of powers. If you get creative, this one can work well. For example, i had one hero who was a robot, but rather than technology, i said he was science because he was actually a human who's persona was transferred to the robot during a laboratory "accident" which was actually a failed assasination attempt.
Temp power – tranquilizer dart. Minor damage plus sleep.
Early enemy – vhazolik. This enemy type can be very tough for Squishies so you might want to choose something else to avoid missions with them.
 Magic
Magic
The magic of this hero can come from within, from training, or from a powerful artifact, but either way they have tapped into the forces of the universe and learned to control it. This is one of my favorite types only because i like writing the back-stories of magic heroes.
Note that in later levels, the enemies that drop SO enhancements are CoT and Carnies. Carnies are very tough on squishies and cot are the #1 hated enemy in the game because of status effects like holds, sleeps, slows, reduced accuracy and such.
Since my first magic character was a "regen" scrapper, i didn't have any problem with these groups. This is because scrappers are tough enough for carnies and the "regen" powerset has a power that makes you all but immune to all knockbacks and status effects.
Temp power – apprentice charm. Minor damage and lowers RES.
Early enemy – hellions. Basically just a street gang. The toughest thing you'll fight at low levels is a fire user or two, but they're basically just a knives and guns type of crowd. The biggest advantage to fighting them early is they're everywhere in galaxy city and atlas park so hunting missions will be easy since they're not hard to find.
 Mutation
This hero was born with a mutation that makes them different from the others around them. For reference, all x-men are mutant heroes.
Temp power – mutagen. Does minor damage, reduces damage potential of the enemy and has a slight chance to choke the enemy for a few seconds.
Early enemy – skulls. Another gang that won't give you much trouble. The toughest early enemies are "bone daddies" who have basic darkness attacks.
 Technology
Again, not super, but has super gadgets. They could be the brilliant person who created the technology or they could have recieved the tech from somewhere else.
Temp power – taser dart. Minor damage and chance to hold the enemy temporarily.
Early enemy – clockwork. They are fun to fight because they're the most interesting of the early enemies, but they can be harder to find for hunting missions. They do have some status effects so they'll be harder than council, hellions, or skulls.
Origin titles
I recently found out that your origin affects the titles you can choose for your character later in the game. There's a full listing here.
Other missions
There are a variety of missions that you will be given that don't involve entering a mission map:
Hunting Missions
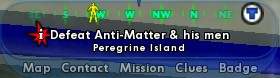
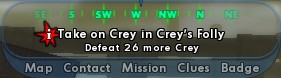 It counts down as you defeat the correct type of enemy
This is where you are commanded to "hit the streets", "take back territory", or "send a message to" some group of enemies. They will be worded different ways, but you will be commanded to find and kill (arrest) some number of that kind of enemy. They will usually be in the same zone as you, but not always.
These are typically the easy and can be fast, but make sure you know where to find these things and that you can kill them. If they command you to kill Vahlolik which are level 6 at most in Galaxy city, but they require that you kill them in Perez (where they are up to level 14), you may not be able to take them without a team. Also if you don't know where to find that type of enemy, you may waste a lot of time just looking for them.
In some cases (including the one in the sample photo above), a hunting mission will specify which city zone to do the hunting in. If you kill them and the counter isn't dropping, you're usually in the wrong place.
Talk to someone
 See below for an imporant tip on this kind of mission
The goal is to speak to or deliver something to an NPC. These are very easy missions, but can be annoying because the contact is usually no where near where you are when you take the mission.
These kinds of missions are usually part of the story plot and are unavoidable, but here's a tip for you:
IMPORTANT! Some TALK TO X missions are specifically designed to introduce you to different parts of the game. For example, the mission to talk to David Wincott in the Hallows was added to introduce players to the zone when it was added to the game. If you've already been through the Hallows, you can skip it by meeting with David to complete the mission, then going straight back to the contact who sent you there and continuing with their missions.Patrol Missions
 The police box you use in patrol missions.
You must go to the target on the map and click the police phone. Then you go to the next target and repeat. After about 5 or so phones, you get a mission bonus. These are good that there's no fighting, but bad in that you will usually travel over the whole zone.
By the way, you might have the same problem I did the first time I got one of these missions. I clicked on the phone expecting something to happen and nothing seemed to. It took me a while to realize that my target changed after I clicked the phone so watch for that.
How to Use Petitions
A petition is a message that's sent directly to the GMs troubleshooting queue. If you are still in the game by the time they get to your message, they will contact you and enter the game to fix the problem if necessary.
Here are some examples:
-
 If a GM shows up, this is what they will look like
I was on one of the respec trials when one of the enemies we needed to defeat to open the first door of the reactor was accidentaly blown through the wall. Since we couldn't get through the locked door to get to him, we sent a petition and had a GM show up a few minutes later.
We explained the problem and he popped through the wall. A second later, we hear massive chaos and the GM's life dropped to 0! We laughed our butt's off!
He showed up a second later and said something like, "Hmmm. That shouldn't have happened." This time he just kept teleporting people fromm the other side of the door to us until we got the key and were able to resume the mission like normal.
Not many people could claim they've seen a GM's Police Drone get defeated 🙂 -
I was in a rescue mission and I saved everyone, but the mission didn't complete. To be sure, I defeated every enemy in the place thinking that I would eventually find the last hostage. Failing that, I sent a petition and had a GM show up. They led me to the funkiest little stairway that I never knew was there.
Though I swore the place was empty, sometimes those damn hostages just hide really well.
Special note! Hitting the TAB key auto-targets enemies that are in your line of sight, even if you can't really see them very well. This is a great way to find hiding hostages or any enemies that have run and hid when doing a "kill all" mission. Also try using a Seek Bind.
-
Remember when I said that bringing a Kheldian on a mission can be a problem? Here's why:
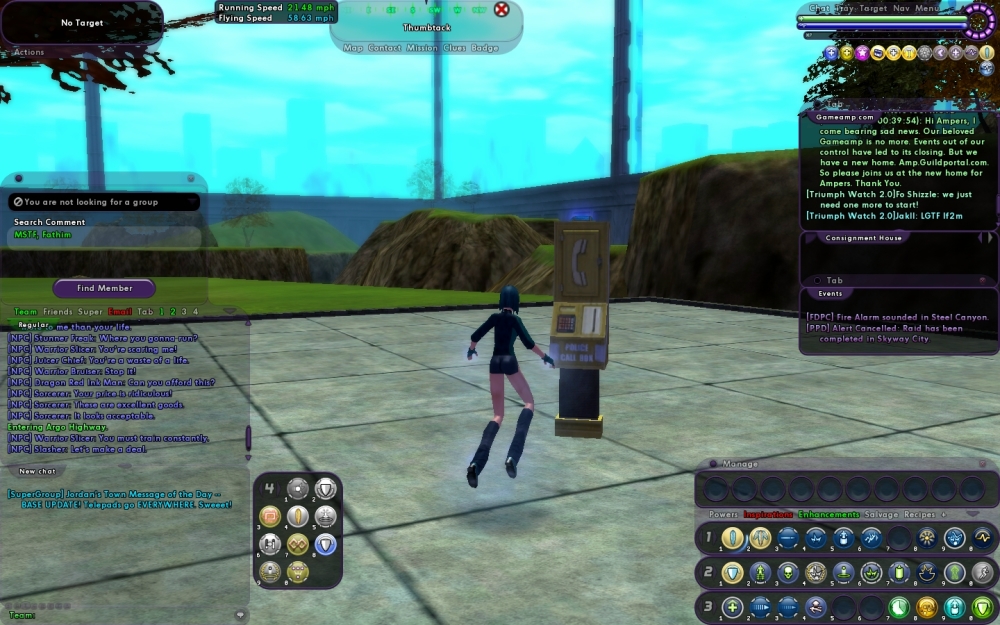
I was on a team doing a tf when we got to the final room of the mission just before the end of the TF. Guess what was there…A crystal.
For those of you who aren't saying "Oh Shit! Noooooo! Why God, Why?", you haven't met a crystal.
 A real show stopper. In this picture, you can see my team abandoning a Katie Hannon TF because a crystal showed up. Sucks.
A crystal works like this: It's a purple crystal (no surprise) that activates as soon as someone from your group gets close enough. The problem is that is is very tough and spawns lesser to greater unbound nictuses. A nictus is a flying thingy that shoots darkness beams and are very tough when there's a lot of them.
The key here was that we weren't very well balanced as far as our levels go, but we were doing fine so far. When we got to this room, the crystal was sitting peacefully in a crowd of enemies that was fairly tough as it was. As soon as we started attacking, the crystal activated and started spawning stuff. Besides of the level gap in our team, the crystals were all +2 from most of us (even the minions).
To keep a long story short, we sent a petition and tried several more times (dying each time before giving up). It seems the GMs were too busy right then to help, but there was no way to complete the mission. By the time we quit, there were over 30 of those +2 nictuses! We had no chance.
Anyway, they can't always come to help you in-game, but sometimes they do. Make sure to send the petition as soon as you're sure that there's a problem to give the GMs time to get to your request and respond.
To send a petition, type /petition 0 0 in the chat window or use the menu to get to the same option (I forget where it is in the menu). You can also type /bug and I think it takes you to the same function.
Preparing to Play City of Heroes
Assuming that you've decided to play City of Heroes, but haven't started yet, here is some really good advice to get you going (if you have started already, reading the following will still probably be useful to you).
Before activating your account
Prior to starting your account, there are many things you can do to learn more about the game. "Why", you may ask, "would I bother to research a game before playing it?" "What fun is that?", says you.
You must remember, the "Massive" in MMO. There will be a lot of people around to taunt, torment, and generally mock you for making really stupid mistakes and asking really simple questions. Even though the community of City of Heroes is generally very kind and patient, there are limits. Most importantly, some simple pieces of advice can save you a lot of grief in the game. For example:
- There are a lot of caves in City of Heroes and tall characters spend most of their time dragging their face across the ceiling. Tip number 1: Keep your characters on the short side.
- Did you know that you can't undo power selections? That means if you make a choice and end up hating it, you're stuck… or are you? I took a character all the way to level 13 before I realized that I really messed up with the power choices and she wasn't really very effective. Little did I realize that a few levels later, I could have done a Repec mission that lets you rebuild your character's power combinations as a reward. Instead, I built a new character with the same basic powers and started over from level 1! Even better, there's a City of Heroes Test Server where you can copy your character to to test out a power without it permenantly affecting your real hero. This is good to know ahead of time.
- Lastly, you will save a lot of time and not feel like such an outsider by learning some of the game speak before you go in. It can slow you down quite a bit (and makes your newness very obvious) when you ask what simple phrases such as "ty", "wtf", and "brb Bio" mean. If a 30 year old like me can comfortably learn and use chat speak, so can you.
- You can take screenshots of your gameplay by pressing the "Print Screen" key on your keyboard. This is useful for memories or for posting information in boards or guides. However, if you keep your graphics settings low because of a weak computer, these screenshots won't look so good. A nice gaming computer doesn't have to be expensive and will help with any other application you run as well so consider an upgrade.
| Make sure you have a computer powerful enough to play the game at a good resolution an detail setting or you'll really miss out. They don't have to be expensive, but be sure to get good components. As a geek friend for help if necessary! |
